
|
Do it yourself
| |||
| ||||


Model: Kawasaki Versys 650
Today we will discover the guide that will allow us to disassemble and replace the rear wheel or tire of the Kawasaki Versys 650. First, we put the motorcycle on the center stand and start unscrewing the central wheel axle, using a socket wrench with extension; then we disconnect the chain from the sprocket and remove the wheel, gently removing the rear brake caliper from the disc, as shown in the video. At this point, if necessary, we replace the rear tire; all that's left is to reassemble the wheel, applying the reverse process of disassembly!
Posted on 6 May 2024 by ScegliAuto
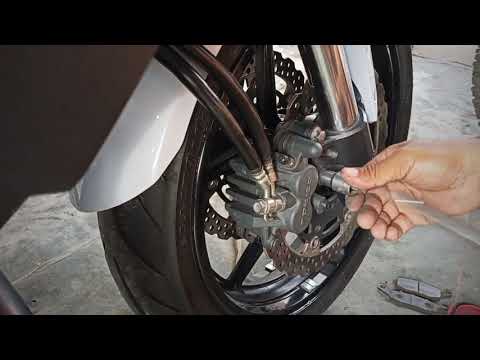 How do you replace the brake pads of the Kawasaki Versys 650?
Versys 650 In order to replace the brake pads of the Kawasaki Versys 650, the same procedure must be followed for both the front and rear wheels: the bolts secu  How to disassemble and install the front wheel of the Kawasaki Versys 650
Versys 650 Let's find out today the steps and instructions that will allow us to disassemble and replace the front wheel of the Kawasaki Versys 650 motorcycle. 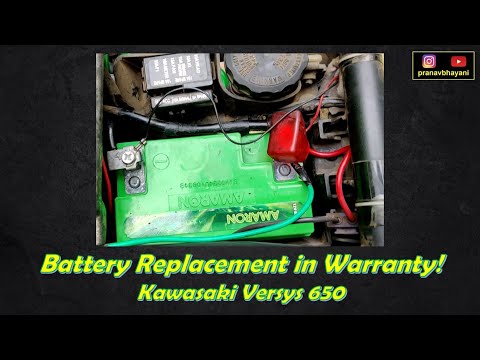 How do you replace the battery on a Kawasaki Versys 650?
Versys 650 To replace the battery of the Kawasaki Versys 650, you need to loosen the screws that secure the motorcycle seat to its housing: this way you can rem |
How do you replace the front headlight of the BMW G310 GS?
In order to replace the front headlight of the BMW G310 GS, you need to loosen the screws that secure the front fairing of the motorcycle to its housing: once the screws that secure the fairing are unscrewed, you will be able to locate the screws that secure the front headlight, which can then be removed from inside its housing by disconnecting the connectors at the back. Once the headlight unit has been removed, you can connect the new replacement part to its connectors, then insert it into its slot: you can secure it with screws and cover it all with the appropriate fairing. by ScegliAuto More videos
|
|
For advertising on this site Write to info@scegliauto.com
ScegliAuto is not responsible for any inaccuracy of the data in the lists. To report any inaccuracy or your business (if you own the business in question), please write to info@scegliauto.com
Number of seconds to generate the page: 0.033
(c) ScegliAuto 2024 - info@scegliauto.com - Privacy Policy VAT number: IT01247470535 |