
|
Fă-o singur
| |||
| ||||


Diagnosticarea și repararea unei defecțiuni cu ajutorul unui tester.
Technology has taken giant steps forward: in fact, we can understand the origin of a fault with the help of modern diagnostic testers (provided by manufacturers, generally to businesses). They need to be connected to the control unit through a specific connection and once connected, we can read the stored faults. Without going into too many unnecessary explanations, this video will illustrate the functioning of the tester with subsequent repair of the fault. First of all, when starting the car, personally check for any unusual sounds or irregular engine operation (when you notice that the engine light turns on). After doing this, if you want confirmation or if you want to clear that light and understand why it turns on, take the tester and connect it to the diagnostic port (usually located under the driver's seat, near the fuse box, but its location varies from model to model). After doing this, once the problem is identified, if it persists after clearing it from the control unit and reappears during a subsequent diagnosis, intervene: in this case, we will hear that it is a problem with the injection pump, which is located under a plastic tube. Remove them and detach the pump, replacing it carefully without breaking the tubes by forcing them. Test everything and redo the diagnosis, it should have been corrected. Remember that it is better to do an initial diagnosis, clear the error, and then redo it later, as sometimes the error in the control unit has been there for a long time.
Introdus la 6 March 2015 by ScegliAuto
Tutorial video
Tutoriale conexe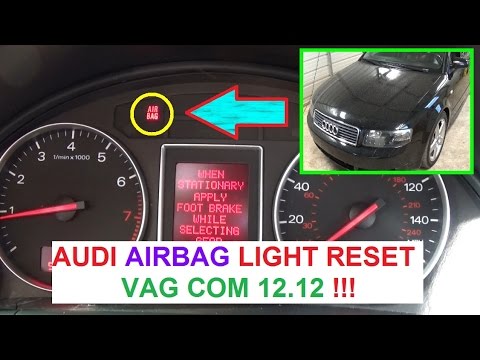
Audi A4
(2000-2004 /
B6)
Pe afișajul panoului de instrumente, se menține aprinsă lumina de avarie a airbag-ului, este recomandat să se efectueze o citire a codurilor de eroar…
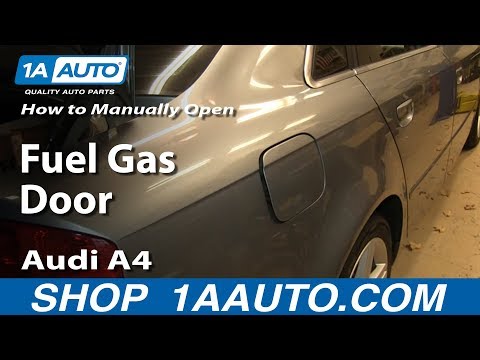
Audi A4
(2004-2008 /
B7)
În Audi A4 se poate întâmpla ca ușa rezervorului de combustibil să se blocheze, de exemplu din cauza unei defecțiuni la actuatorul corespunzător sau …
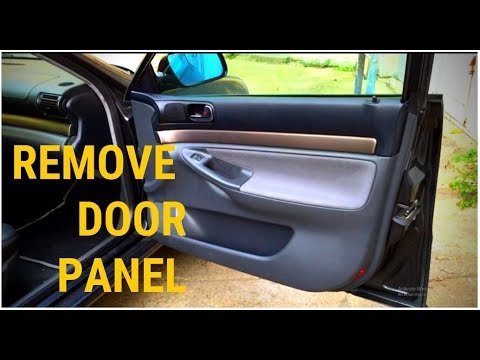
Audi A4
(1994-2000 /
B5)
Avem panoul ușii rupt? Să vedem cum îl înlocuim. Înainte de a începe demontarea, deconectăm clemele bateriei din compartimentul motorului. Cu o pârgh…
Alte ghiduri care te-ar putea interesa |
Cum să înlocuiți manșonul de schimbare pe Opel Meriva.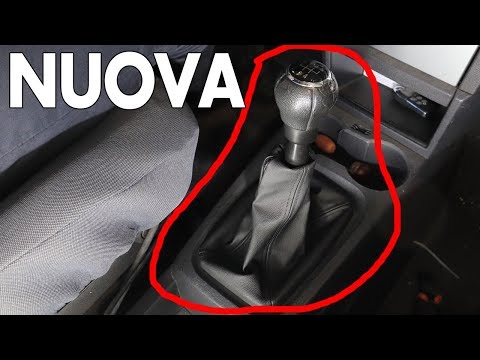
Doriți să înlocuiți manșonul schimbătorului de viteze de pe Opel Meriva? Să vedem în acest videoclip cum să procedăm: dezlipim cadrul manșonului de la plasticul de pe tunelul central (tăiem clema de plastic cu o foarfecă). După ce am scos manșonul de înlocuit, montăm noua bucată. Facem remontarea: montăm manșonul pe cadru de plastic, apoi îl introducem în tija de schimbare (fixăm clema așa cum se arată în videoclip). Coborâm manșonul până se încastrează în plasticul tunelului central. Testăm montajul corect al pieselor montate anterior. by ScegliAuto Alte videoclipuri
|
|
Pentru publicitatea pe acest site Scrie la info@scegliauto.com
ScegliAuto nu este responsabil pentru eventualele inexactități ale datelor din listă. Pentru a semnala o posibilă inexactitate sau activitatea dvs. (dacă sunteți titularul activității respective), vă rugăm să scrieți la info@scegliauto.com
Numărul de secunde necesare pentru generarea paginii: 0.024
(c) ScegliAuto 2026 - info@scegliauto.com - Politica de confidențialitate Cod TVA: IT01247470535 |