
|
Fă-o singur
| |||
| ||||


Înlocuirea placuțelor de frână din față.
Model: Opel Zafira
MK 1, T98, Zafira A
- Ani 1999-2005
Once the car has been lifted and the wheel on which you want to work has been removed, it is possible to see the brake caliper that houses the brake pads and which is installed with a hinge system that makes it very easy to remove. However, before proceeding, it is suggested to use a medium-sized flat screwdriver to pry on the old brake pads, in order to slightly retract the piston and facilitate its removal.
At this point, loosen the fixing bolt of the caliper located at the bottom, behind the caliper itself, and rotate it completely upwards to release the brake pads. Then remove the front and rear brake pads and disconnect the possible wear sensor cable. With the appropriate clamp, completely retract the piston in order to create the housing for the new brake pads, which, of course, have a greater thickness. Insert the brake pads into the appropriate seats of the caliper (the position is mandatory due to the appropriate geometry of the seat itself), then lower the caliper and lock it by tightening the relative fixing bolt. Reconnect the possible wear sensor cable and proceed with the reassembly of the wheel. Before driving, remember to pump the brake pedal until it offers the appropriate resistance, thus correctly repositioning the cylinder.
Introdus la 6 December 2013 by ScegliAuto
Tutorial video
Tutoriale conexe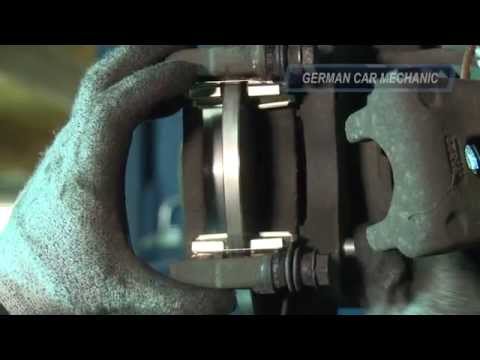
Opel Zafira
(1999-2005 /
MK 1, T98, Zafira A)
Odată ridicat vehiculul și demontate roțile, demontați șuruburile de fixare a clemei de frână de suportul său și îndepărtați-o de pe locul său; scoat…
Opel Zafira
(2005-2011 /
Zafira B, A05, MK 2)
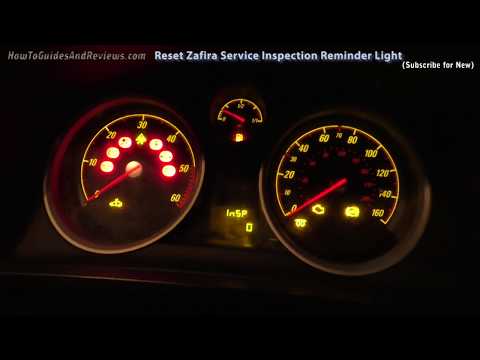
Restoring the service light of the 2011 Opel Zafira is a simple operation that is performed after each service. The first thing to do is to press and…
Opel Zafira
(1999-2005 /
MK 1, T98, Zafira A)
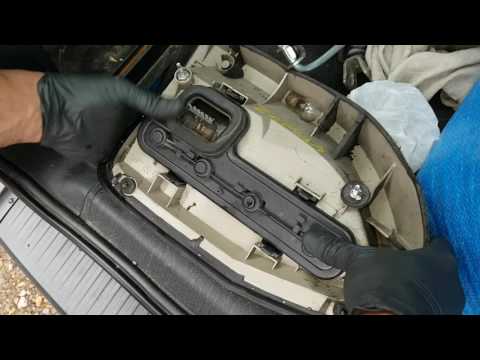
Pentru a putea înlocui becul farului din spate, este necesar să demontați farul în sine; deschideți apoi portbagajul și îndepărtați porțiunea de tapi…
Alte ghiduri care te-ar putea interesa
|
Cum să demontezi mânerul interior de la un Volkswagen Golf.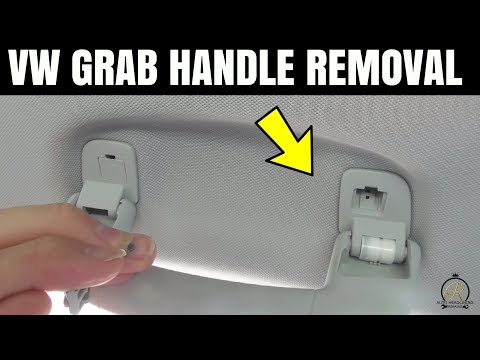
În acest videoclip vedem cum să demontăm și să înlocuim mânerul (intern) de susținere al unui Volkswagen Golf. Operația este foarte ușoară dacă urmăm pașii corecți. În primul rând, dezlipim cu un șurubelniță clemele metalice ale manetei, luăm mânerul și îl scoatem din suport. După ce am îndepărtat primul suport, trecem să îndepărtăm și celălalt suport de susținere în același mod. Demontăm complet piesa: montăm noul mâner de susținere cu toate suporturile de susținere așa cum au fost demontate anterior. În final, testăm funcționarea corectă a mânerului. by ScegliAuto Alte videoclipuri
|
|
Pentru publicitatea pe acest site Scrie la info@scegliauto.com
ScegliAuto nu este responsabil pentru eventualele inexactități ale datelor din listă. Pentru a semnala o posibilă inexactitate sau activitatea dvs. (dacă sunteți titularul activității respective), vă rugăm să scrieți la info@scegliauto.com
Numărul de secunde necesare pentru generarea paginii: 0.025
(c) ScegliAuto 2026 - info@scegliauto.com - Politica de confidențialitate Cod TVA: IT01247470535 |