
|
Fă-o singur
| |||
| ||||


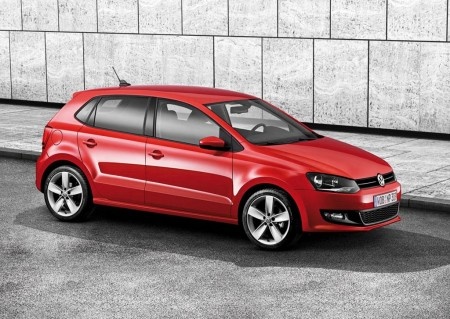
Cum să înlocuiți becul de la farul din față al Volkswagen Polo mk5
Model: Volkswagen Polo
6R, MK V, Polo 5, Polo V, MK 5
- Ani:
2009, 2010, 2011, 2012, 2013, 2014, 2015, 2016, 2017
Tutorial video
The guide shows how to replace the bulbs of the front lights of the 2014 Volkswagen Polo. As the first step, you must turn off the vehicle and secure it. After opening the hood and securing it, you can proceed to remove the two Torx T30 screws; it is possible to disconnect the power cable of the respective light and, after applying slight traction and disconnecting the two clips of the light body, you can remove the piece. After detaching the protective cover of the bulb to be replaced, simply rotate the connector counterclockwise and remove it. At this point, after checking the model of the bulb to be replaced, you can proceed with the replacement. By following the steps in reverse, it is possible to reassemble the light in position. Check the proper functioning of the lights before using the vehicle.
Introdus la 4 June 2021 by ScegliAuto
Tutoriale conexe
Volkswagen Polo
(2009-2017 /
6R, MK V, Polo 5, Polo V, MK 5)
Cum să înlocuiți becul din farul din față al modelului Polo? Pentru a demonta becul din fața farului, trebuie să îndepărtați capacul de protecție. În…

Volkswagen Polo
(2009-2017 /
6R, MK V, Polo 5, Polo V, MK 5)
Pentru a înlocui becul farului din față al Volkswagen Polo, trebuie să deschideți capota și să slăbiți șuruburile care fixează farul de partea superi…

Volkswagen Polo
(2009-2017 /
6R, MK V, Polo 5, Polo V, MK 5)
Pentru a înlocui becul farului din față al Volkswagen Polo, se deschide capota pentru a avea acces la șuruburile care fixează farul din partea sa sup…
Alte ghiduri care te-ar putea interesa
|
Cum se deschide capota la Mitsubishi L200?
În acest tutorial putem vedea cum să deschidem capota la Mitsubishi L200, o operațiune foarte simplă și care nu diferă de procedura standard. În primul rând, deschidem vehiculul și ne deplasăm pe partea șoferului, apoi identificăm levierul amplasat în partea inferioară exterioară, chiar în fața pedalelor, și îl acționăm. Apoi ne poziționăm în fața capotei, identificăm al doilea levier amplasat deasupra logo-ului Mitsubishi și îl împingem spre dreapta, eliberând astfel încuietoarea. În acest moment putem ridica complet capota și o putem fixa cu ajutorul unui suport special. by ScegliAuto Alte videoclipuri
|
|
Pentru publicitatea pe acest site Scrie la info@scegliauto.com
ScegliAuto nu este responsabil pentru eventualele inexactități ale datelor din listă. Pentru a semnala o posibilă inexactitate sau activitatea dvs. (dacă sunteți titularul activității respective), vă rugăm să scrieți la info@scegliauto.com
Numărul de secunde necesare pentru generarea paginii: 0.029
(c) ScegliAuto 2026 - info@scegliauto.com - Politica de confidențialitate Cod TVA: IT01247470535 |
