
|
Gör det själv
| |||
| ||||


Byte av kupéluftfilter
Modell: Mazda 3
BL, MK 2
- År 2009-2013
The passenger compartment air filter (actually there are two) is located behind the central tunnel and it is necessary to remove the passenger side storage compartment to access it.
The first step is to remove the central dashboard trim: simply open the door of the storage compartment and pull the trim with your hands to detach it. Then unscrew the two fixing screws of the storage compartment and pull it to detach and remove it from its seat; then disconnect the bulb holder along with the power supply socket. Release and remove the plastic cover panel of the fuse box: there are two side tabs to press. Remove the triangular plastic cap located on the side of the central tunnel, near the floor mat, by pulling the central snap fastener. Then rotate the two fixing screws of the fuse box, lower it and disconnect the connectors connected to it; at this point, unscrew the rear fixing screws of the box (it is recommended to use a flexible screwdriver) and move it sideways so that the cabin air filters can be removed later. Right at the bottom of the central tunnel, you can see the cap of the cabin air filter container, which is fixed with two screws that need to be removed. Once the cap is removed, the two filters can be pulled out. Clean the filter container and insert the two new filters (one on top of the other) respecting the direction of the airflow. Then reassemble everything that was previously removed.
Infogat 4 May 2016 by ScegliAuto
Video-handledning
Relaterade handledningar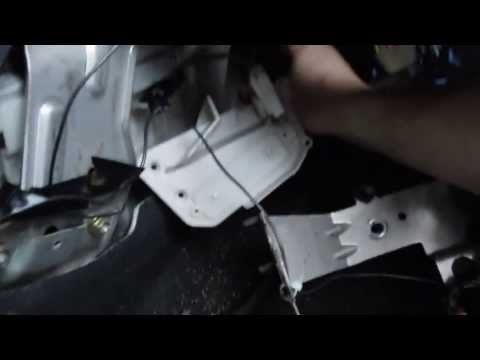
Mazda 3
(2003-2009 /
MK 1, BK)
Luftfilter för kupén finns på passagerarsidan, bakom förvaringsfacket som måste tas bort. Öppna facket, lossa den centrala panelen på instrumentbräda…
Mazda 3
(2003-2009 /
MK 1, BK)
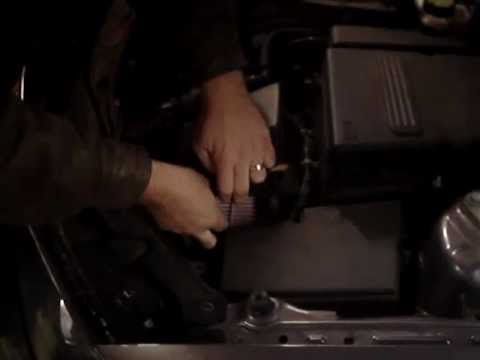
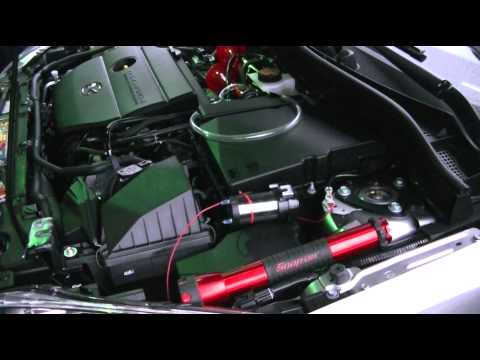
Luftfilterbehållaren för motorn finns på den högra främre delen (sett framifrån), under luftkanalen: skruva loss den sidofästet på luftkanalen som si…
Mazda 3
(2009-2013 /
BL, MK 2)
Öppna motorhuven och hitta filtret som finns i luftlådan på höger sida av motorn. Lossa fjädrarna som är fästa på locket genom att lyfta dem uppåt oc…
Andra guider som kan vara av intresse
|
Hur man demonterar värmekylaren på en Mini Cooper.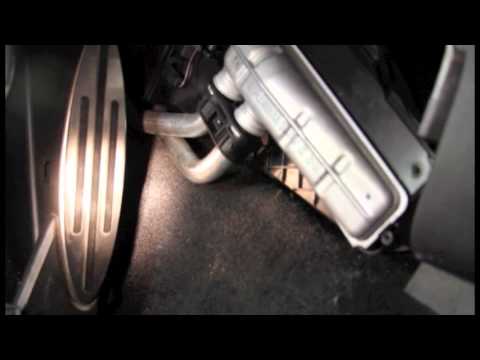
Låt oss se hur man demonterar värmekylaren på en Mini Cooper. Först och främst: ta bort plastskyddet från den centrala tunneln (som är placerad under den vänstra delen av tunneln). Skruva loss fästskruvarna med en skruvmejsel och ta bort den svarta plasten som täcker värmekylaren. När alla dessa åtgärder är utförda, gå till motorutrymmet: ta bort plastskyddet för motorn och koppla loss de två slangarna (skruva loss klämmorna om de finns) från värmekylaren som går in i kupén, låt vätskan rinna ut. Koppla loss värmekylaren från rören inne i kupén. Gå baklänges genom alla monteringssteg. by ScegliAuto Fler videor
|

|
För reklam på denna webbplats Skriv till info@scegliauto.com
ScegliAuto är inte ansvarig för eventuella felaktigheter i uppgifterna i listorna. För att rapportera felaktigheter eller din verksamhet (om du är ägare), vänligen skriv till info@scegliauto.com
Antal sekunder för att generera sidan: 0.042
(c) ScegliAuto 2026 - info@scegliauto.com - Sekretessinformation Momsregistreringsnummer: IT01247470535 |