
|
Gör det själv
| |||
| ||||


Byte av främre bromsbelägg.
Modell: Opel Zafira
MK 1, T98, Zafira A
- År 1999-2005
Once the vehicle has been lifted and the wheel on which you want to work has been removed, it is possible to view the brake caliper that houses the brake pads and which is installed with a hinge system that makes it very easy to remove. However, before proceeding, it is suggested to lever with a medium-sized flat screwdriver on the old brake pads, in order to slightly retract the piston and facilitate its extraction. At this point, loosen the fixing pin of the caliper located at the bottom, behind the caliper itself and rotate it completely upwards to release the brake pads. Then remove the front and rear brake pads and disconnect the possible wear sensor cable. With the appropriate clamp, completely retract the piston in order to create the housing for the new brake pads, which of course have a greater thickness. Place the brake pads in the appropriate seats of the caliper (the position is mandatory due to the appropriate geometry of the seat itself), then lower the caliper and lock it by tightening the relative fixing pin. Reconnect the possible wear sensor cable and proceed with the reassembly of the wheel. Before driving, remember to pump the brake pedal until it opposes the appropriate resistance, thus correctly repositioning the cylinder.
Infogat 6 December 2013 by ScegliAuto
Video-handledning
Relaterade handledningar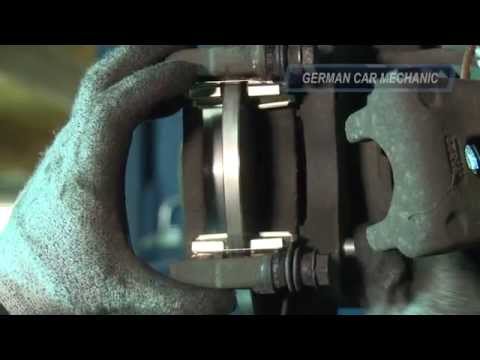
Opel Zafira
(1999-2005 /
MK 1, T98, Zafira A)
När bilen har lyfts och hjulen har demonterats, ta bort fästbultarna för bromsoket från sin hållare och ta bort det från sin plats; ta bort de gamla …
Opel Zafira
(2005-2011 /
Zafira B, A05, MK 2)
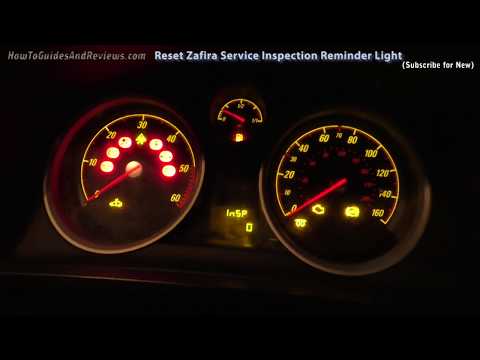
Återställa serviceindikatorn för service på Opel Zafira från 2011 är en enkel åtgärd som utförs efter varje service. Det första du behöver göra är at…
Opel Zafira
(1999-2005 /
MK 1, T98, Zafira A)
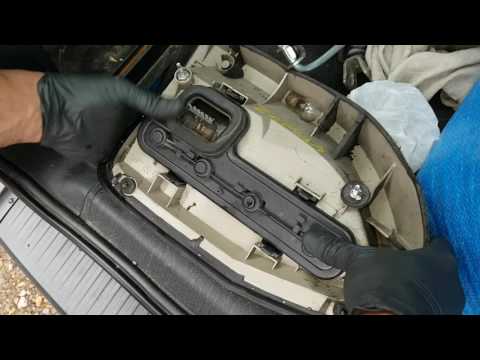
För att kunna byta ut baklyset måste du demontera själva lyktan; öppna sedan bagageutrymmet och ta bort den mattbeklädda delen som sitter precis bako…
Andra guider som kan vara av intresse
|
Hur man tar bort originalradion på en Mercedes A-klass.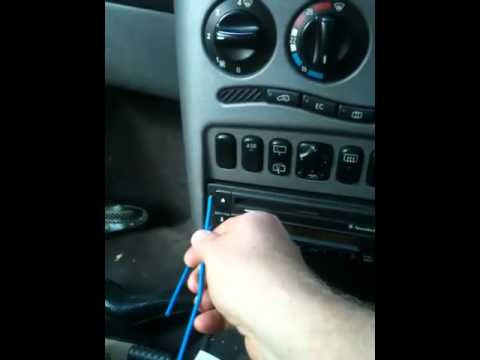
Hur man demonterar originalradion på en Mercedes A-klass? Låt oss noggrant se hur demonteringen utförs. Vi använder antingen originalmetallnycklarna eller eftermarknadsnycklar för att demontera bilens stereo: vi sätter in nycklarna i hålen på den plastbeklädda radion, drar radion mot oss med händerna som visas i videon, tar ut radion och är försiktiga med de olika kablarna (kopplar loss strömkontakterna och antennkabeln). Slutligen monterar vi tillbaka den originala radion eller en generisk märkesradio med en lämplig adapter för anslutning och anslutning av strömkontakterna. by ScegliAuto Fler videor
|
|
För reklam på denna webbplats Skriv till info@scegliauto.com
ScegliAuto är inte ansvarig för eventuella felaktigheter i uppgifterna i listorna. För att rapportera felaktigheter eller din verksamhet (om du är ägare), vänligen skriv till info@scegliauto.com
Antal sekunder för att generera sidan: 0.046
(c) ScegliAuto 2026 - info@scegliauto.com - Sekretessinformation Momsregistreringsnummer: IT01247470535 |