
|
Do it yourself
| |||
| ||||


Citroen C3 - Video tutorial
Model: Citroen C3
SC
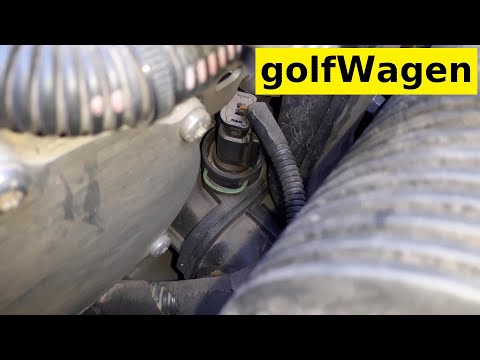
- Years 2009-2016 The task of the Lambda probe is to detect the concentration of oxygen inside the exhaust gases, in order to maintain the mixture ratio within the optimal efficiency range of the vehicle's catalytic converter. In this video, we see how to replace them on the Citroen C3, where there are two: one lower and one upper, and they are replaced between 80,000 and 100,000 km. Universal type probes from Bosch can be found online with the code B0068N1CQO on Amazon, priced at 51.90 each, with free delivery for Prime customers. With the hood open, we remove the red connector, but to remove the upper one, a special key is required, as we see in the video, but it is easily removed. In the same way, we insert the new one and reconnect the plug. To access the lower one, we need to go under the car, always disconnecting a plug from above, but the procedure is the same, as we see in the video. Here too, we reconnect the plug. Job done.
Posted on 25 December 2023 by ScegliAuto
 How to remove the coolant temperature sensor of a Citroen C3
Citroen C3 (2002-2009 / FN, FC) Before we can begin, we will have to go and open the front hood of our Citroen C3. The sensor is positioned near the left side of the head. This proc 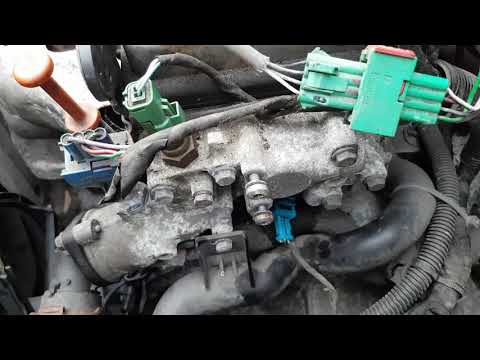 Citroen C3 1.4i temperature sensor replacement guide
Citroen C3 (2002-2009 / FN, FC) In this short and simple guide we will see the instructions necessary to disassemble and replace the coolant temperature sensor of the Citroen C3 1.4 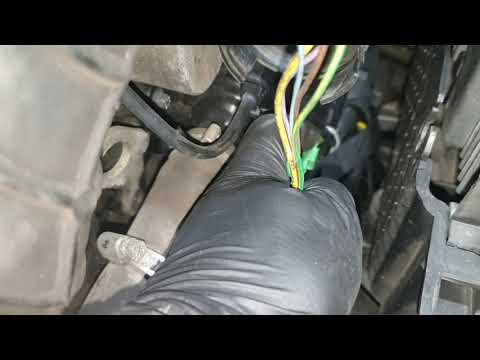 Replacement of the temperature sensor on the Citroen C3 1.4 HDI
Citroen C3 (2002-2009 / FN, FC) Let's find out the steps necessary to remove and replace the coolant temperature sensor on Citroen C3 first series, with 1.4 HDI engine. First of all Other guides that may interest you |
How do I replace the Land Rover Evoque auxiliary battery?
In order to replace the auxiliary battery of the Land Rover Evoque, it is necessary to go inside the passenger compartment and remove the panel which is positioned immediately under the glovebox. Once the screws that secure this panel have been loosened, it will be possible to access the components located in its rear part, including the auxiliary battery. The latter must be disconnected from its cables and the fixing screws must be loosened. The battery can then be replaced with a new one and the panel can be fixed again with its screws. by ScegliAuto More videos
|
|
For advertising on this site Write to info@scegliauto.com
ScegliAuto is not responsible for any inaccuracy of the data in the lists. To report any inaccuracy or your business (if you own the business in question), please write to info@scegliauto.com
Number of seconds to generate the page: 0.058
(c) ScegliAuto 2024 - info@scegliauto.com - Privacy Policy VAT number: IT01247470535 |