
|
Do it yourself
| |||
| ||||


Model: Husqvarna Husqvarna Te450
Today I will show you how to replace the engine oil and the filter on our Husqvarna te450, First we take a container that we are going to use for the collection of the used oil and place it under the sump so now we can unscrew the drain plug of the oil (after the oil has drained everything we give two strokes to start the engine so as to expel the oil left in circulation in the engine) now we replace the drain plug and move on to the change of the oil filters, to change the first we have to unscrew the bolts of the cover code houses the filter, disassembled the cover we extract the old filter we clean with a cloth and insert the new filter, the second filter is on the opposite side to the first and it is a metal filter, we unscrew the bolt we extract the filter and clean it with petrol, reassemble everything and finally insert the new oil from the filler cap.
Posted on 14 November 2023 by ScegliAuto
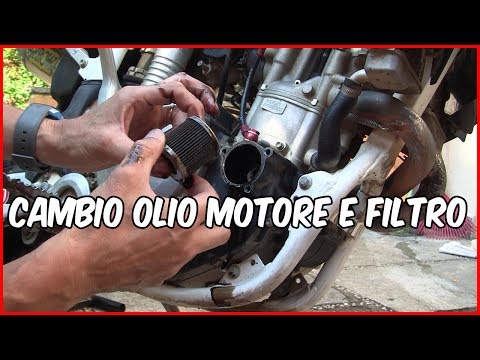 How to replace engine oil and oil filter on a Husqvarna te450
Husqvarna Te450 Today I will show you how to replace the engine oil and the filter on our Husqvarna te450, First we take a container that we are going to use for the  Change the Husqvarna FC 250 engine oil and oil filter
Fc 250 Today we will illustrate the steps on how to carry out the routine maintenance service, replacing the engine oil and oil filter, of the Husqvarna FC  Change the Husqvarna FE 450 engine oil and oil filter
Fe 450 Let's see today the instructions necessary to carry out the routine maintenance service, replacing the engine oil and the oil filter, of the Husqvarn |
How do you replace the headlight bulb of the Kawasaki Vulcan 650 S?
In order to replace the headlight bulb of the Kawasaki Vulcan 650 S, you need to loosen the screws that secure the headlight unit to its housing: these screws are located at the bottom of the headlight, which once removed, the headlight can be removed from its housing. By disconnecting the connectors at the back, it will be possible to also remove the bulb inside, connecting the new one to the appropriate connectors. At this point, the new bulb can be inserted into its housing, securing the headlight unit back to its place. by ScegliAuto More videos
|
|
For advertising on this site Write to info@scegliauto.com
ScegliAuto is not responsible for any inaccuracy of the data in the lists. To report any inaccuracy or your business (if you own the business in question), please write to info@scegliauto.com
Number of seconds to generate the page: 0.296
(c) ScegliAuto 2024 - info@scegliauto.com - Privacy Policy VAT number: IT01247470535 |