
|
Do it yourself
| |||
| ||||


Land Rover Freelander - Video tutorial
Model: Land Rover Freelander
Freelander 2
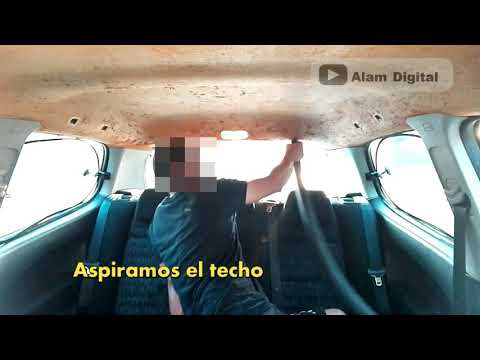
- Years 2006-2016 The following video aims to explain how to remove the headliner of a Land Rover Freelander 2 after the fabric has come loose and needs to be repaired. We get on board the vehicle and start by removing the sun visors, the rearview mirror, the door handles, the central light, and the screws located inside the headliner covered by plastic. To perform these disassembly operations, you will only need to use a star screwdriver or a Torx key. Then we remove the headliner of the vehicle and peel off the fabric. We clean it with a brush and glue the new fabric with suitable glue. Once dry, finish the edges and wait for it to dry before repositioning the headliner inside.
Posted on 26 April 2024 by ScegliAuto
 How to remove the roof of a Land Rover Freelander
Land Rover Freelander (1997-2006 / Freelander 1) How to remove the roof of a Land Rover Freelander? Let's see in this video how to proceed. We begin to disassemble the side handles of the sky with a 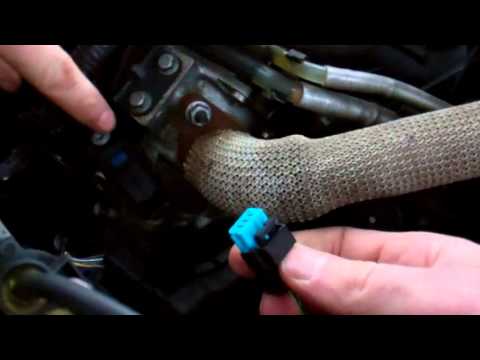 How to replace the EGR valve in a Land Rover Freelander 2
Land Rover Freelander (2006-2016 / Freelander 2) This video clearly describes the procedure for removing and replacing the EGR valve in a Land Rover Freelander 2. After opening the front hood and re 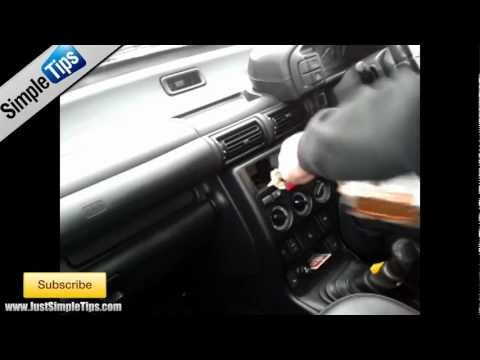 Disassembly of the car radio for repair
Land Rover Freelander (1997-2006 / Freelander 1) To remove the radio from the console, carefully unscrew the screws holding the cover on the sides of the radio. Remove the car radio and disconnect a Other guides that may interest you
|
How do I replace the Land Rover Evoque auxiliary battery?
In order to replace the auxiliary battery of the Land Rover Evoque, it is necessary to go inside the passenger compartment and remove the panel which is positioned immediately under the glovebox. Once the screws that secure this panel have been loosened, it will be possible to access the components located in its rear part, including the auxiliary battery. The latter must be disconnected from its cables and the fixing screws must be loosened. The battery can then be replaced with a new one and the panel can be fixed again with its screws. by ScegliAuto More videos
|
|
For advertising on this site Write to info@scegliauto.com
ScegliAuto is not responsible for any inaccuracy of the data in the lists. To report any inaccuracy or your business (if you own the business in question), please write to info@scegliauto.com
Number of seconds to generate the page: 0.055
(c) ScegliAuto 2024 - info@scegliauto.com - Privacy Policy VAT number: IT01247470535 |