
|
Do it yourself
| |||
| ||||


Volkswagen Golf - Video tutorial
Model: Volkswagen Golf
Golf V, MK 5, Golf 5
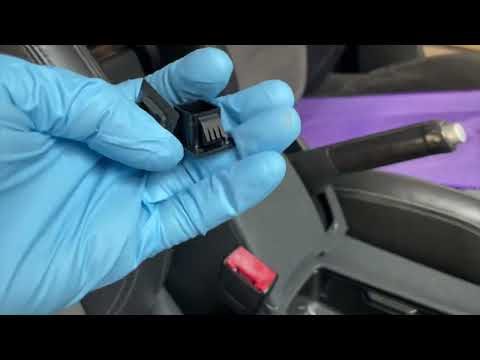
- Years 2003-2008 In this video we see how to remove the glove box from the Volkswagen Golf Plus: it may be necessary to do so to access, for example, the fan. We will start by removing two T20 torx screws from the bottom, then three more are in the top and inside of the glove box. Now with a screwdriver we pry on the outer part of the dashboard, which is held only by plastic clips. The fittings are very well made and are really tenacious, so detaching the two parts from each other is not easy at all, you have to apply force, but gently so as not to break anything. We will have to disconnect the light inside the glove box, while there will be no need to disconnect the airbag cables.
Posted on 27 April 2024 by ScegliAuto
 Disassembling the storage compartment with a shutter on the Volkswagen Golf.
Volkswagen Golf (2008-2012 / Golf VI, MK 6, Golf 6, 5K1) If we want to proceed with replacing the storage compartment located in the central console, in the following description we will find step-by-step i 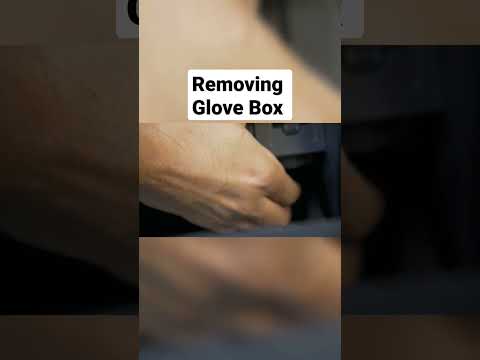 How to disassemble the storage compartment of the Volkswagen Golf 7.
Volkswagen Golf (2012-2019 / Golf 7, Golf VII, MK 7) To disassemble the storage compartment of the Volkswagen Golf 7, start by opening the storage compartment. Inside the upper part of the compartment, 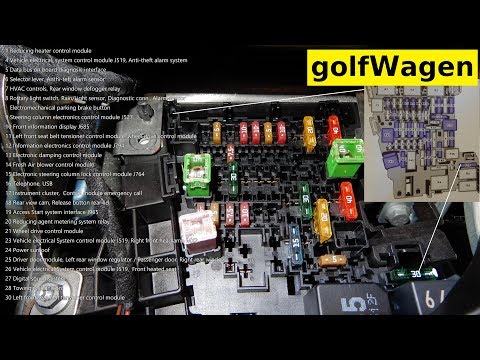 What is the Volkswagen Golf fuse scheme?
Volkswagen Golf (2012-2019 / Golf 7, Golf VII, MK 7) In this video we can see the position of the fuse boxes, and the relative diagrams, of the Volkswagen Golf 7, useful in case we need to check the fus Other guides that may interest you
|
Frequently Asked QuestionsHow do I replace the Land Rover Evoque auxiliary battery?
In order to replace the auxiliary battery of the Land Rover Evoque, it is necessary to go inside the passenger compartment and remove the panel which is positioned immediately under the glovebox. Once the screws that secure this panel have been loosened, it will be possible to access the components located in its rear part, including the auxiliary battery. The latter must be disconnected from its cables and the fixing screws must be loosened. The battery can then be replaced with a new one and the panel can be fixed again with its screws. by ScegliAuto More videos
|
|
For advertising on this site Write to info@scegliauto.com
ScegliAuto is not responsible for any inaccuracy of the data in the lists. To report any inaccuracy or your business (if you own the business in question), please write to info@scegliauto.com
Number of seconds to generate the page: 0.059
(c) ScegliAuto 2024 - info@scegliauto.com - Privacy Policy VAT number: IT01247470535 |