
|
Do it yourself
| |||
| ||||


How to Repair the Boot Release Button on a Mini R56 for Little Cost
Model: Mini Mini
R56, R55, R57
- Years 2007-2014
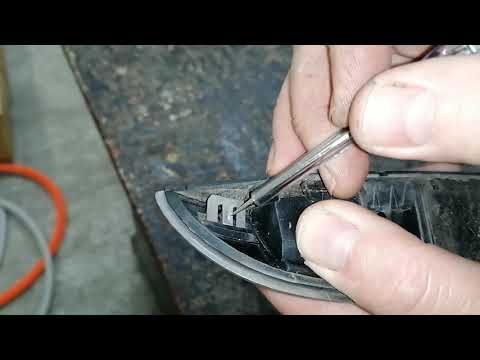
A common fault with the Mini is the rear hatch button, which is often left as it is because replacing it is too expensive. In this video, you will learn how to replace it for very little cost and with some manual skills. Start by unscrewing the star screws (four in total) and then disassemble the piece; it consists of clips, so it's not difficult. However, there is one part where you need to be careful: cut the welded part, as there is a circuit underneath, and cutting it will cause problems. The button shown in the video is a momentary push type, similar to those used for horns. Now comes the tricky part as you need to be able to redo all the wiring. In the video, the interior lights were replaced with LED models. Reassemble everything in reverse order, and now it not only opens but also has a nice light.
Updated on 23 May 2026 by ScegliAuto
Video tutorial
Related tutorials
Mini
(2007-2014 /
R56, R55, R57)
In this video we see how to repair the broken, or otherwise defective, rear hatch button of a Mini R56. This is a very common issue on this type of c…

Mini
(2007-2014 /
R56, R55, R57)
Let's see how to repair the reverse lights of a Mini R56: according to the workshops, the fault was repaired by changing the body computer, with a si…
Mini
(2007-2014 /
R56, R55, R57)
In this tutorial, you will see how to remove the boot release button on the Mini One, a very simple and quick operation, for example, if you need to …
Other guides you may be interested in |
Frequently Asked QuestionsHow to Connect the Cables to the Battery of the Citroen Xsara Picasso?
In this tutorial, you will see how to connect the cables to the battery of the Citroen Xsara Picasso, useful if you need to recharge it or perform an emergency start. First, ensure the key is not inserted, then open the bonnet and move to the front of the left headlamp. Next, locate the bolt just behind the filter box and connect the positive terminal clamp to it. Now you can connect the negative terminal to any point on the chassis, such as the indicated point. Once the operation is complete, ensure you disconnect the negative first and then the positive. by ScegliAuto More videos
|

|
For advertising on this site Write to info@scegliauto.com
ScegliAuto is not responsible for any inaccuracy of the data in the lists. To report any inaccuracy or your business (if you own the business in question), please write to info@scegliauto.com
Number of seconds to generate the page: 0.073
(c) ScegliAuto 2026 - info@scegliauto.com - Privacy policy VAT number: IT01247470535 |
