
|
Do it yourself
| |||
| ||||


How to clean the injectors in Audi engines
Model: Audi A3
8V, MK 3
- Years 2012-2019
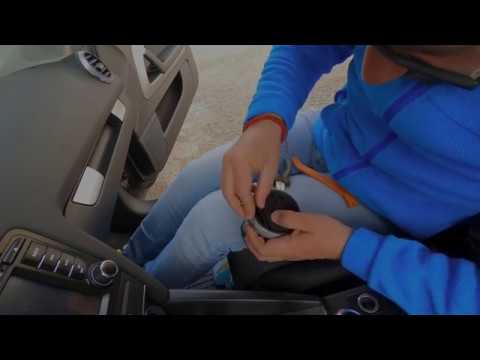
In this video tutorial we can see how it is possible to disassemble and clean the injectors in Audi engines. First you have to lift the engine hood and secure it with the special rod. The necessary material: flame protection washers, screws, greasy liquid for threads, a pair of gloves, additive to put in the tank, a release agent to facilitate the extraction of the injectors, a 17 key, to remove the connection between the rail and the 'injector, Volkswagen original liquid for cleaning the injectors, ultrasonic tank to immerse the injectors and be able to clean them, a little oil to lubricate the injectors when they need to be put back in place, an 8 mm thousand-line wrench to remove the screw and torque wrench. There are four injectors in question; there are two yield screws to remove. After 45 minutes of washing the injectors, reassemble them following the entire procedure including lubrication.
Posted on 7 April 2022 by ScegliAuto
Video tutorial
Related tutorials
Audi A3
(2012-2019 /
8V, MK 3)
All the fuse boxes of the Audi A3 are responsible for containing the fuses that regulate the operation of the devices installed on the vehicle: in th…

Audi A3
(2012-2019 /
8V, MK 3)
In this video we see how to clean the airflow sensor of an Audi A3, but the procedure is the same for all cars of the V.A.G. group. We start by remov…
Audi A3
(2003-2013 /
MK 2, 8P)
This short video teaches us how to easily disassemble and extract the air vents in an Audi A3, regardless of whether they are the central or side one…
Other guides you may be interested in
|
Removing the Front Wheel of a Yamaha Tmax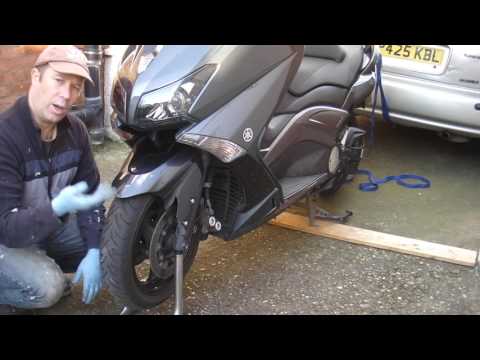
In this video tutorial, you will learn how to remove the front wheel of a Yamaha Tmax 530 (penultimate series). First, remove the fork bolts using a ratchet spanner: then also remove the brake caliper. Now, you will need a stand to lift the front of the bike to safely remove the wheel: then unscrew the central bolt of the wheel: at this point, you can remove it. If desired, you can also remove the mudguard by unscrewing the relevant screws. Apply the reverse procedure for reassembly! by ScegliAuto More videos
|

|
For advertising on this site Write to info@scegliauto.com
ScegliAuto is not responsible for any inaccuracy of the data in the lists. To report any inaccuracy or your business (if you own the business in question), please write to info@scegliauto.com
Number of seconds to generate the page: 0.111
(c) ScegliAuto 2026 - info@scegliauto.com - Privacy policy VAT number: IT01247470535 |