
|
Do it yourself
| |||
| ||||


How do you repair the hood of the Smart Roadster?
Model: Smart Smart
452, Roadster
- Years 2003-2005
In order to repair the hood of the Smart Roadster, it is necessary to close it completely, so that the fabric covering of the hood can be removed from the relative interlocking pins. Subsequently, the fabric will have to be unglued from the remaining part of the mechanism, so that it can be completely removed. At this point it will be possible to glue the new fabric, making sure that it is completely spread and that there is no damage during the closing phase. Finally, the cover can be inserted into the appropriate pins, checking that the hood closes and opens correctly.
Posted on 3 April 2022 by ScegliAuto
Video tutorial
Related tutorials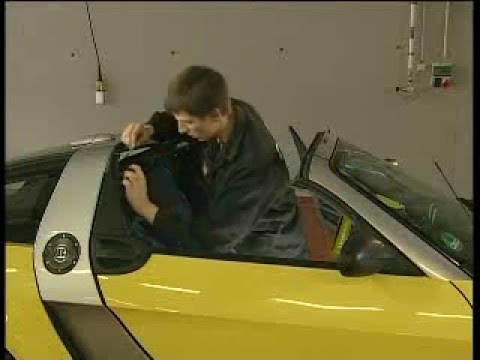
Smart
(2003-2005 /
452, Roadster)
The repair of the hood on the Smart Roadster is carried out by pressing the appropriate button located inside the passenger compartment and which all…

Smart
(2003-2005 /
452, Roadster)
In this short guide, we will see the main instructions that will allow us to disassemble and replace the cables of the electric hood of the Smart Roa…

Smart
(2003-2005 /
452, Roadster)
In this short guide, we will see the information related to the adjustment and alignment of the Smart Roadster's hood. One of the problems related to…
Other guides you may be interested in |
How to Dismantle the Heating Radiator on a Mini Cooper
Let’s see how to dismantle the heating radiator on a Mini Cooper. First, remove the plastic cover of the centre tunnel (located under the centre tunnel on the left). Unscrew the securing screws with a screwdriver, and remove the black plastic cover that hides the heating radiator. Once all the described operations are completed, move to the engine bay: remove the plastic engine cover and disconnect the two hoses (unscrew the securing clips if present) of the radiator that goes into the cabin, allowing the fluid to drain. Disconnect the radiator from the pipes inside the cabin. Work in reverse for all the assembly steps. by ScegliAuto More videos
|
|
For advertising on this site Write to info@scegliauto.com
ScegliAuto is not responsible for any inaccuracy of the data in the lists. To report any inaccuracy or your business (if you own the business in question), please write to info@scegliauto.com
Number of seconds to generate the page: 0.049
(c) ScegliAuto 2026 - info@scegliauto.com - Privacy policy VAT number: IT01247470535 |