
|
Do it yourself
| |||
| ||||


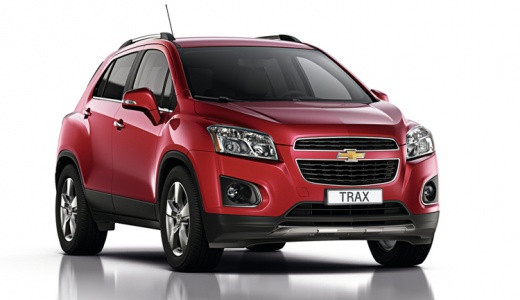
How to Replace the Rear Bulb on a Chevrolet Trax
Model: Chevrolet Trax
MK 1
- Years:
2013, 2014, 2015, 2016, 2017, 2018, 2019, 2020, 2021, 2022
Video tutorial
To replace the rear bulb on the Chevrolet Trax, open the boot. Use a small flathead screwdriver to remove the 2 caps covering the screws of the light unit. With a crosshead screwdriver, unscrew the 2 screws and use a plastic tool to detach the rear light from its clips. Once the light is removed, take the bulb to be replaced, turn it slightly counterclockwise to extract it, and simply pull the bulb out. Take the new bulb, remove it from the packaging, and insert it in place of the old one. Refit the bulb by turning it slightly clockwise, reposition the light unit, secure it with the 2 screws, and replace the caps.
Updated on 13 July 2026 by ScegliAuto
Related tutorials
Chevrolet Trax
(2013-2022 /
MK 1)
To correctly replace the button battery located inside the smart key of your Chevrolet Trax, follow these simple steps. First, obtain a flat screwdri…

Chevrolet Trax
(2013-2022 /
MK 1)
Today, we will go through the instructions to remove and replace the rear wiper blade on the Chevrolet Trax in simple steps. First, move to the rear …

Chevrolet Trax
(2013-2022 /
MK 1)
Thanks to the steps described in the following guide aimed at all of you who own a first-generation Chevrolet Trax, you will be able to find the OBD2…
Other guides you may be interested in
|
How to Replace the Glow Plugs in the Fiat Ducato 2.3 Multijet?
Glow plugs, as the name suggests, raise the temperature of the engine in diesel vehicles to allow for easier starting. The manufacturer, in this case, Fiat for the Ducato 2.3 Multijet, specifies how often they should be replaced, and a warning light will illuminate when it's time. This work is carried out under the bonnet. First, remove the upper engine cover, then lift the coil and, using a socket wrench of the appropriate size, unscrew the glow plug to remove it from the base, followed by installing the new one. by ScegliAuto More videos
|
|
For advertising on this site Write to info@scegliauto.com
ScegliAuto is not responsible for any inaccuracy of the data in the lists. To report any inaccuracy or your business (if you own the business in question), please write to info@scegliauto.com
Number of seconds to generate the page: 0.198
(c) ScegliAuto 2026 - info@scegliauto.com - Privacy policy VAT number: IT01247470535 |
