
|
Do it yourself
| |||
| ||||


How to Update the Navigation Maps of the Dacia Duster
Model: Dacia Duster
HM, MK 2
- Years 2017-2024
To update the navigation maps of the Dacia Duster, start by using your PC and accessing the "Dacia Duster forum UK" group on Facebook. Click on the pinned announcements at the top of the group, then click on the link for point 10. Next, click on the link for the instructions and installation of Ultralite. Search for the zip file named after the system version (in the video, it is referred to as mn3). Right-click the file and select "download". Once downloaded, locate the compressed file in your downloads folder, right-click it, and select "extract files". After extracting the files, select them all, right-click, and copy them to a USB stick. You can then remove the USB stick and head to your car. Once inside the car, start the engine, turn on the system, insert the USB stick into the appropriate slot, and wait without touching anything until the system restarts. After the system has restarted, remove the USB stick, turn the system back on, and check that everything has been installed correctly by clicking on "navi", "destination", "options", "map updates", "maps", and verify the updates.
Updated on 8 May 2026 by ScegliAuto
This video is currently unavailable
Related tutorials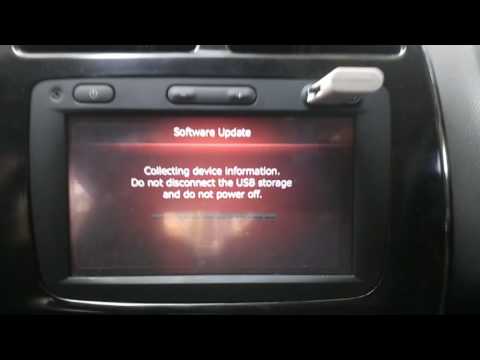
Dacia Duster
(2010-2017 /
HS, MK 1)
First, format a USB drive and insert it into the designated port near the navigation display to ensure no data is present on the drive. Now, press th…

Dacia Duster
(2017-2024 /
HM, MK 2)
In this video tutorial, you can see how to update the navigation system on the Dacia Duster. Updating the navigation maps is important as the road ne…

Dacia Duster
(2010-2017 /
HS, MK 1)
In this video guide, you will learn about the Medianav navigation system in the Dacia Duster while performing an update. Insert the USB stick with th…
Other guides you may be interested in
|
How to Replace the Battery on a Honda Vision 110
To replace the battery on a Honda Vision 110, you need to remove the front fairing of the motorcycle, located directly under the front headlamp. To loosen this panel, unscrew the two screws found at its top, just below the handlebar. Once these screws are loosened, lever under the panel to detach it, gaining access to the battery underneath: this battery must be removed from its housing by unscrewing the fixing screws and disconnecting the power cables, replacing it with a new one. by ScegliAuto More videos
|
|
For advertising on this site Write to info@scegliauto.com
ScegliAuto is not responsible for any inaccuracy of the data in the lists. To report any inaccuracy or your business (if you own the business in question), please write to info@scegliauto.com
Number of seconds to generate the page: 0.091
(c) ScegliAuto 2026 - info@scegliauto.com - Privacy policy VAT number: IT01247470535 |
