
|
Do it yourself
| |||
| ||||


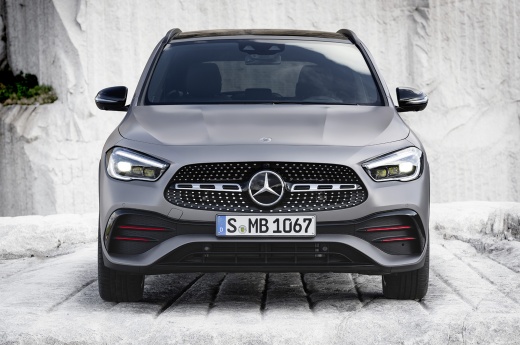
How to Install Diffusers on the Front Bumper of a Mercedes GLA
Model: Mercedes Gla
MK 2, H247
- Years:
2020, 2021, 2022, 2023, 2024, 2025, 2026
Video tutorial
Let's see how to apply the diffusers on the front bumper of a Mercedes GLA: You can find the diffusers on Amazon with code B0D7S34W7K for £76.56, with free delivery. To start, clean the area thoroughly with a cloth; do not position the diffusers flush with the edge, but slightly further in for a more AMG-like aesthetic. Remove the protective backing from the adhesive; if it seems weak, you can reinforce it with additional 3M tape. Start with the side that seems to align best (in the video, the driver's side) and press firmly, working from the inside out. If you misplace it, the adhesive may lose its stickiness and will need to be replaced. Measure carefully before sticking, as the adhesive has a strong grip, and once attached, it is difficult to remove.
Posted on 24 July 2026 by ScegliAuto
Related tutorials
Mercedes Gla
(2013-2019 /
W156, MK 1)
Do you want to replace the front bumper on your Mercedes GLA Class? Let's see how to proceed in this video. Open the engine bay and disconnect the ba…

Mercedes Gla
(2020-2026 /
MK 2, H247)
In this guide we will see the main instructions that will allow us to disassemble and replace the front headlight of the Mercedes GLA. First of all, …
Mercedes Gla
(2013-2019 /
W156, MK 1)
This guide provides instructions for removing the rear bumper from a first-generation Mercedes GLA. First, open the boot and unscrew the fastening sc…
Other guides you may be interested in |
How to Replace the Glow Plugs in the Fiat Ducato 2.3 Multijet?
Glow plugs, as the name suggests, raise the temperature of the engine in diesel vehicles to allow for easier starting. The manufacturer, in this case, Fiat for the Ducato 2.3 Multijet, specifies how often they should be replaced, and a warning light will illuminate when it's time. This work is carried out under the bonnet. First, remove the upper engine cover, then lift the coil and, using a socket wrench of the appropriate size, unscrew the glow plug to remove it from the base, followed by installing the new one. by ScegliAuto More videos
|
|
For advertising on this site Write to info@scegliauto.com
ScegliAuto is not responsible for any inaccuracy of the data in the lists. To report any inaccuracy or your business (if you own the business in question), please write to info@scegliauto.com
Number of seconds to generate the page: 0.017
(c) ScegliAuto 2026 - info@scegliauto.com - Privacy policy VAT number: IT01247470535 |
