
|
Do it yourself
| |||
| ||||


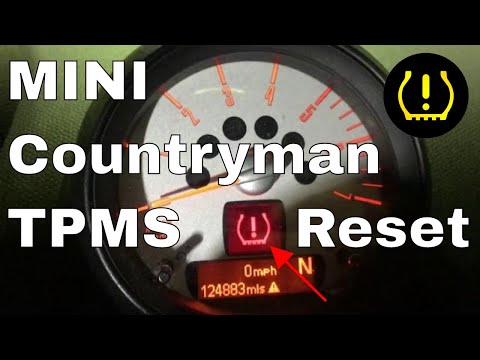
How to reset the tire pressure light in the Mini Countryman?
Model: Mini Mini
R60, Countryman1
- Years 2010-2016
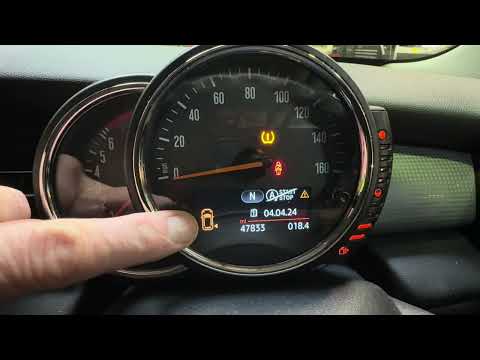
In this tutorial we can see how to reset the tire pressure warning light in the Mini Countryman, an extremely simple and quick operation, to be performed only once the correct pressure of each tire has been restored following the instructions in the manual. First of all, let's go inside the cabin, then insert the key and turn on the instrument panel. Next, scroll through the various information on the display using the "BC" button located at the end of the left lever, reach the "SET/INFO" option and hold down the same button to enter the section. At this point, all that remains is to position ourselves on the icon depicting the warning light in question and hold down the button again until the reset is complete.
Posted on 20 November 2025 by ScegliAuto
Video tutorial
Related tutorials
Mini
(2010-2016 /
R60, Countryman1)
The activation of the TPMS light indicates a possible puncture or pressure loss from one or more tires; in this guide we will see how to reset the ti…
Mini
(2010-2016 /
R60, Countryman1)
If the orange tire pressure warning light on the instrument panel of your 2015 Mini Countryman continues to stay on, it means that the control unit h…
Mini
(2010-2016 /
R60, Countryman1)
In order to reset the tire pressure warning light on the Mini Countryman, you need to inflate all the tires that are at an insufficient inflation pre…
Other guides you may be interested in
|
How to Replace the Engine Air Filter on BMW 3 Series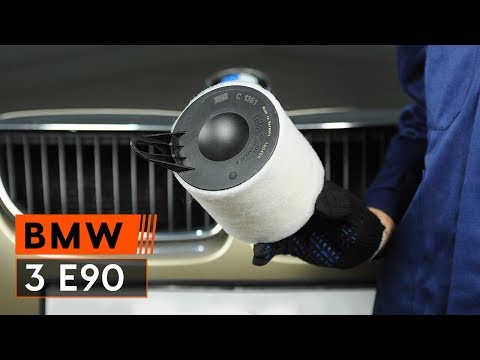
How to replace the engine air filter on BMW 3 Series? Let's see how to proceed in this video: open the car door, pull up the engine hood release lever located at the bottom left of the dashboard, and lift the front hood, securing it. Using a screwdriver, remove the air box assembly (where the air filter is located), disconnect the engine air intake hose and the metal clamp pin. Remove the air filter box from the vehicle body, then extract the worn air filter and insert a new one, ensuring it fits snugly around the walls of the box. Finally, reassemble the air box panel and tighten the screws. Close the front hood when finished. by ScegliAuto More videos
|

|
For advertising on this site Write to info@scegliauto.com
ScegliAuto is not responsible for any inaccuracy of the data in the lists. To report any inaccuracy or your business (if you own the business in question), please write to info@scegliauto.com
Number of seconds to generate the page: 0.094
(c) ScegliAuto 2026 - info@scegliauto.com - Privacy policy VAT number: IT01247470535 |