
|
Do it yourself
| |||
| ||||


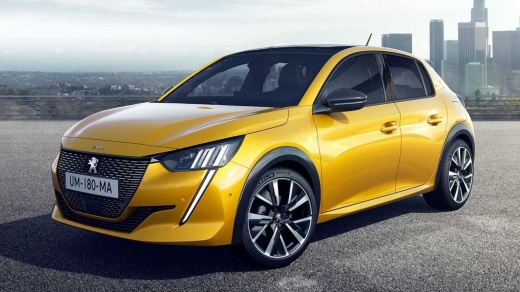
How to Dismantle the Fuel Filler Flap on a Peugeot 208
Model: Peugeot 208
UP, UW, UB, UJ, MK 2
- Years:
2019, 2020, 2021, 2022, 2023, 2024, 2025, 2026
Video tutorial
In this video, see how to dismantle the fuel filler flap on a Peugeot 208: start by removing the cap, then use a hook to insert into the hole at the base of the rubber cover of the cap (be careful not to damage the bodywork), and lift the cover, which is a single piece, using the cap located on the outer side, which will help you pull the whole piece off in one go. Be careful not to dislodge the seal of the filler neck, which must remain in place, and when pulling off the cover, the flap will come off as well. To reattach it, perform the reverse operation, always being careful with the seal of the filler neck.
Posted on 4 March 2026 by ScegliAuto
Related tutorials
Peugeot 208
(2012-2019 /
MK 1, A9)
The TPMS light on a Peugeot 208 illuminates when it's necessary to adjust the tyre pressure. Tyre pressure can be adjusted by a professional tyre fit…

Peugeot 208
(2012-2019 /
MK 1, A9)
Follow these instructions to remove and replace the fuel pump on a Peugeot 208 in simple steps. First, open the rear doors and start by removing the …

Peugeot 208
(2019-2026 /
UP, UW, UB, UJ, MK 2)
In this video, you can see how to charge the electric version of the Peugeot 208: the vehicle comes with a cable that you will connect to the wallbox…
Other guides you may be interested in |
How to Replace the Glow Plugs in the Fiat Ducato 2.3 Multijet?
Glow plugs, as the name suggests, raise the temperature of the engine in diesel vehicles to allow for easier starting. The manufacturer, in this case, Fiat for the Ducato 2.3 Multijet, specifies how often they should be replaced, and a warning light will illuminate when it's time. This work is carried out under the bonnet. First, remove the upper engine cover, then lift the coil and, using a socket wrench of the appropriate size, unscrew the glow plug to remove it from the base, followed by installing the new one. by ScegliAuto More videos
|
|
For advertising on this site Write to info@scegliauto.com
ScegliAuto is not responsible for any inaccuracy of the data in the lists. To report any inaccuracy or your business (if you own the business in question), please write to info@scegliauto.com
Number of seconds to generate the page: 0.030
(c) ScegliAuto 2026 - info@scegliauto.com - Privacy policy VAT number: IT01247470535 |
