
|
Do it yourself
| |||
| ||||


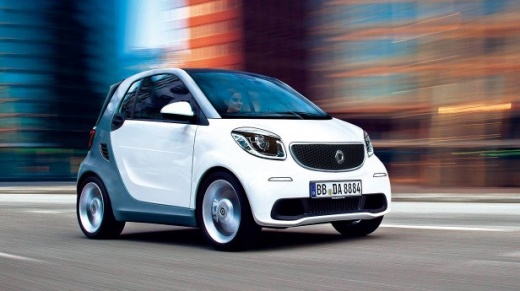
How to replace SMA side air intake
Model: Smart Smart
453
- Years 2014-2022
When we buy a car we are asked what elements we want to configure our car. Later we may want to further modify the vehicle for example with aesthetic tuning elements. One of the cars that lends itself beautifully to these jobs is the Smart. Online you can find countless kits, some even ready to be painted, therefore even more extensive customization. However, let's see how to replace the side air intakes of our Fortwo. We unhook the piece to be replaced first from one side until it is disengaged from its seat, to note that it is only necessary to pull towards us. The spare could be simply interchangeable or, as in this video, applicable with adhesive. So first we clean the affected area and then we gently house the piece. When we are satisfied we could press the edges to fix it. We repeat on the other side.
Posted on 26 February 2020 by ScegliAuto
Video tutorial
Related tutorials
Smart
(1998-2007 /
450)
In this new mini guide dedicated to your Smart 450 (year 1998-2007), we will discover how to replace the front headlight bulb quickly and safely. Fir…

Smart
(2004-2006 /
Fourfour1, 454)
The cabin air filter on a Smart Four Four model 451 vehicle is located inside the cabin. Specifically, the filter is located under the passenger side…

Smart
(1998-2007 /
450)
The car fuse box is located to the left of the steering wheel under the dashboard, to access it you need to remove the plastic cover panel, the diagr…
Other guides you may be interested in
|
How to Replace the Rear Door Lock on an Audi A4
First, disconnect the negative cable from the battery. Now, open the door in question and lift the chrome strip at the top. Then, remove all the screws indicated in the video. You can now lift the door panel by pulling it towards you. Disconnect the connectors at the back and remove the panel. Next, you will need to remove the components shown in the video. Also, detach the weatherstrip around the door and the protective sheet. You will also need to remove the window glass by disconnecting all the connectors and bolts. Then, replace the damaged part and retrace the steps described in reverse. by ScegliAuto More videos
|
|
For advertising on this site Write to info@scegliauto.com
ScegliAuto is not responsible for any inaccuracy of the data in the lists. To report any inaccuracy or your business (if you own the business in question), please write to info@scegliauto.com
Number of seconds to generate the page: 0.053
(c) ScegliAuto 2026 - info@scegliauto.com - Privacy policy VAT number: IT01247470535 |