
|
Do it yourself
| |||
| ||||


How to Change the Front Bulbs on a Volkswagen Caddy III
Model: Volkswagen Caddy
MK 3, 2K
- Years 2003-2020
Let's see how to change the front bulbs on a Volkswagen Caddy III: the dipped beams are H7; simply rotate and detach the rear cover, remove the metal clip, rotate the bulb counter-clockwise by 1/4 turn, and take out the old bulb. Reassemble in reverse order, taking care not to touch the glass with bare hands. For the main beams, you will need an H1; disconnect the connector, press and pull sideways, lower the safety latch, and extract the bulb, then fit the new one and reconnect the connector. The position lights are W5W, located in the indicator compartment. Pull the connector: the bulb will come out directly, and replace it with the new one. For the indicators, you need PY21W bulbs, orange with a large base; rotate counter-clockwise and pull out; to remove the bulb, push and rotate.
Posted on 1 August 2026 by ScegliAuto
Video tutorial
Related tutorials
Volkswagen Caddy
(2003-2020 /
MK 3, 2K)
The front headlight bulbs of a Volkswagen Caddy III are H7 for the low beam and W5W for the position lights. It is advisable to perform this operatio…

Volkswagen Caddy
(2003-2020 /
MK 3, 2K)
In this short guide, we will see how to adjust the height of the front headlights of the Volkswagen Caddy. First, position yourself in front of a fix…
Volkswagen Caddy
(2003-2020 /
MK 3, 2K)
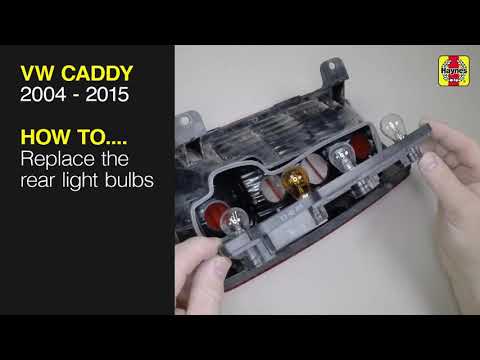
In this video, you will find the instructions to remove the rear light and replace the bulbs on the Volkswagen Caddy, from 2004 to 2015. First, open …
Other guides you may be interested in
|
How to Connect the Cables to the Battery of the Citroen Xsara Picasso?
In this tutorial, you will see how to connect the cables to the battery of the Citroen Xsara Picasso, useful if you need to recharge it or perform an emergency start. First, ensure the key is not inserted, then open the bonnet and move to the front of the left headlamp. Next, locate the bolt just behind the filter box and connect the positive terminal clamp to it. Now you can connect the negative terminal to any point on the chassis, such as the indicated point. Once the operation is complete, ensure you disconnect the negative first and then the positive. by ScegliAuto More videos
|
|
For advertising on this site Write to info@scegliauto.com
ScegliAuto is not responsible for any inaccuracy of the data in the lists. To report any inaccuracy or your business (if you own the business in question), please write to info@scegliauto.com
Number of seconds to generate the page: 0.209
(c) ScegliAuto 2026 - info@scegliauto.com - Privacy policy VAT number: IT01247470535 |
