
|
Do it yourself
| |||
| ||||


|
Model: Kawasaki Ninja 400
To change the motor oil of a Kawasaki Ninja 400, start by lifting the bike using a suitable stand to ensure a stable and safe position. Under the engine, locate the oil drain plug, usually located at the bottom of the engine block. Place a collection container under the plug and loosen the bolt using an appropriate wrench, allowing the used oil to drain completely into the container. Once the oil has been completely drained, reattach the drain plug and tighten the bolt with the same wrench, making sure it is securely fastened to prevent leaks. Then, locate the oil fill point, which is usually located on the top of the engine or near the oil fill cap. Remove the fill cap and, using a funnel, slowly pour the new motor oil into the cavity, following the capacity and type of oil specifications indicated in the user manual. After adding the oil, replace the fill cap and make sure it is securely screwed on. Start the engine and let it run for a few minutes to allow the oil to circulate inside the engine and check for any leaks. Finally, turn off the engine and check the oil level to ensure it is correct. If necessary, add more oil until reaching the appropriate level. The oil change is now complete and your Kawasaki Ninja 400 should run smoothly.
Posted on 27 July 2024 by ScegliAuto
Video tutorial
Related tutorials
Ninja 400
Changing the engine oil in the Kawasaki Ninja 400 is a straightforward and quick task. First, ensure the engine is completely cold for safety. Positi…

Ninja 400
Changing the engine oil in a Kawasaki Ninja 400 is an extremely simple and quick task. First, ensure the engine is cool enough. Then, position a cont…

Ninja 400
In this tutorial we can see how to replace the engine oil in the Kawasaki Ninja 400, an extremely simple and quick operation. First of all, we wait f…
|
How to Replace the Clutch on a Triumph Speed Triple?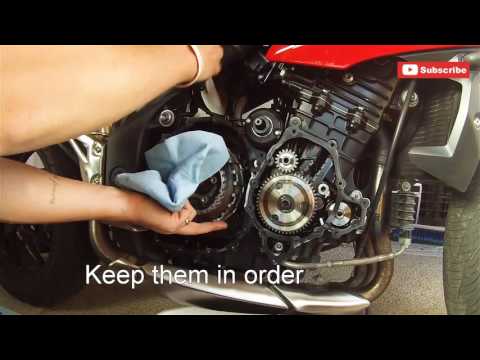
To replace the clutch on a Triumph Speed Triple, loosen the bolts securing the covers of the three casings located on the right side of the bike, namely the starter motor, the engine, and then the clutch. Once these covers are removed, you can access the bolts securing the clutch, unscrew them, and slide the clutch plates out of their housing. This will allow you to insert the new plates into their place, securing everything with the appropriate bolts; finally, reinstall all the casings. by ScegliAuto More videos
|
|
For advertising on this site Write to info@scegliauto.com
ScegliAuto is not responsible for any inaccuracy of the data in the lists. To report any inaccuracy or your business (if you own the business in question), please write to info@scegliauto.com
Number of seconds to generate the page: 0.011
(c) ScegliAuto 2026 - info@scegliauto.com - Privacy policy VAT number: IT01247470535 |
