
|
Do it yourself
| |||
| ||||


Preparation of polishing wax
Model: Lexus IS
MK 2
- Years 2005-2013 If you want to keep the bodywork always shiny and sparkling, it must be taken care of periodically by treating it with suitable polishing and at the same time protective waxes. There are countless products on the market but it is also possible to prepare a homemade wax based on carnauba wax (it is a wax obtained from the leaves of a palm tree) and beeswax; the preparation also requires the use of white spirit and pine essential oil. For the preparation it is necessary to use two pots for cooking so called "in a bain marie", that is, fill a pot with water to be placed on the stove and place another pot on top that will be heated by the steam of the boiling water; then dissolve the two waxes in a bain-marie, remove from the heat and add white spirit and essential pine oil. Once cooled it will be an excellent polishing wax.
Posted on 18 August 2023 by ScegliAuto
This video is currently unavailable
 Bodywork polishing instructions
Lexus IS (2005-2013 / MK 2) If on the bodywork there are the halos of a previous polishing plus the signs of the car wash brushes, it is necessary to carry out a professional po
Touch-up by brush on the bodyworkLexus IS (2005-2013 / MK 2) In case of small scratches and slight scratches of the paint, it is possible to carry out some retouching with a brush in order to eliminate the mark
Wheel rim cleaning instructionsLexus IS (2013-2023 / MK 3) Car washing is one of the moments of greatest pleasure for those who love to take care of their car: doing it personally, perhaps on Saturday afterno Other guides that may interest you |
How to deactivate the safe lock on a Volkswagen Golf.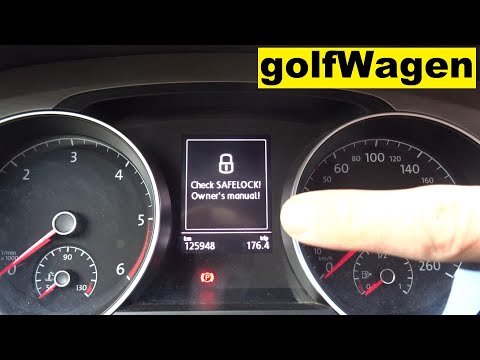
The safe lock is indeed an anti-theft system that prevents thieves from accessing the car. This device locks the doors, both externally and internally, when the driver activates the central locking remote control after leaving the vehicle. To permanently disable it, it is necessary to use a diagnostic program such as VCDS that we will connect to the vehicle through the ODBII port. Then wait for the connection and recognition of the control unit and then select the blocks present and locate the safe lock to disable it. And the job will be completed. by ScegliAuto More videos
|
|
For advertising on this site Write to info@scegliauto.com
ScegliAuto is not responsible for any inaccuracy of the data in the lists. To report any inaccuracy or your business (if you own the business in question), please write to info@scegliauto.com
Number of seconds to generate the page: 0.024
(c) ScegliAuto 2024 - info@scegliauto.com - Privacy Policy VAT number: IT01247470535 |