
|
Do it yourself
| |||
| ||||


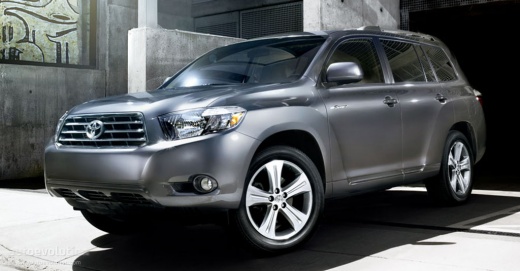
Homemade Roof Rails for Toyota Highlander
Model: Toyota Highlander
Xu40
- Years:
2008, 2009, 2010, 2011, 2012, 2013
Video tutorial
A fairly simple method to build roof rails for your Toyota Highlander. On the roof of this SUV, there are plastic covers. Remove them to access the factory mounting points for the roof rails. In this case, the YouTuber simply removed them and made the mounts for what are just simple 1" hollow tubes. You can choose to buy them in stainless steel, so you won't have to deal with them again. Then, you need to fit plastic caps on the ends to reduce noise while driving. You will also need stainless steel bolts of 8 mm, along with their nuts and washers, nylon nuts also of 8 mm, and 4 half-moon washers to support the tubes.
Updated on 15 June 2026 by ScegliAuto
Related tutorials
Toyota Highlander
(2020-2026 /
Xu70)
As shown in the video, before installing a step on your 2021 Toyota Highlander, remove two screws with a Torx screwdriver and a rear bolt using a 10 …

Toyota Highlander
(2014-2019 /
Xu50)
The procedure to replace the button battery in the smart key of your 2019 Toyota Highlander is very similar to that used in other models from the sam…

Toyota Highlander
(2014-2019 /
Xu50)
In this guide, you will see how to reset the tyre pressure warning light on a Toyota Highlander, model produced from 2014 to 2019, in just a few simp…
Other guides you may be interested in |
How to Replace the Glow Plugs in the Fiat Ducato 2.3 Multijet?
Glow plugs, as the name suggests, raise the temperature of the engine in diesel vehicles to allow for easier starting. The manufacturer, in this case, Fiat for the Ducato 2.3 Multijet, specifies how often they should be replaced, and a warning light will illuminate when it's time. This work is carried out under the bonnet. First, remove the upper engine cover, then lift the coil and, using a socket wrench of the appropriate size, unscrew the glow plug to remove it from the base, followed by installing the new one. by ScegliAuto More videos
|
|
For advertising on this site Write to info@scegliauto.com
ScegliAuto is not responsible for any inaccuracy of the data in the lists. To report any inaccuracy or your business (if you own the business in question), please write to info@scegliauto.com
Number of seconds to generate the page: 0.038
(c) ScegliAuto 2026 - info@scegliauto.com - Privacy policy VAT number: IT01247470535 |
