
|
Do it yourself
| |||
| ||||


Volkswagen Tiguan - Windshield wipersWindshield Wipers Volkswagen Tiguan (2016-2025 / bw, mk 2, ad) Volkswagen Tiguan (2007-2016 / 5N, MK 1)
How to replace the windshield wiper blades of the Volkswagen Tiguan The windshield wiper blades of the Volkswagen Tiguan must be replaced at least once a year, using worn blades could damage the windshield. To replace them, we …Read all… Posted on 17 August 2025 by ScegliAuto  Volkswagen Tiguan (2016-2025 / BW, MK 2, AD)
How to replace the rear windshield wiper of the 2017 Volkswagen Tiguan Today we will show you the steps to replace the rear windshield wiper blade on a 2017 Volkswagen Tiguan. Stand in front of the rear windshield of the car and …Read all… Posted on 28 May 2025 by ScegliAuto  Volkswagen Tiguan (2016-2025 / BW, MK 2, AD)
How to replace the rear windshield wiper of the 2017 Volkswagen Tiguan Replacing the rear windshield wiper of your Volkswagen Tiguan (2017) is really very simple. All you have to do is carefully read the procedure described below …Read all… Posted on 23 February 2025 by ScegliAuto  Volkswagen Tiguan (2016-2025 / BW, MK 2, AD)
How to replace the windshield wiper of the Volkswagen Tiguan If you want to replace the windshield wiper of your Volkswagen Tiguan on your own, just follow the procedure described in our new guide. First of all, enter …Read all… Posted on 11 July 2024 by ScegliAuto 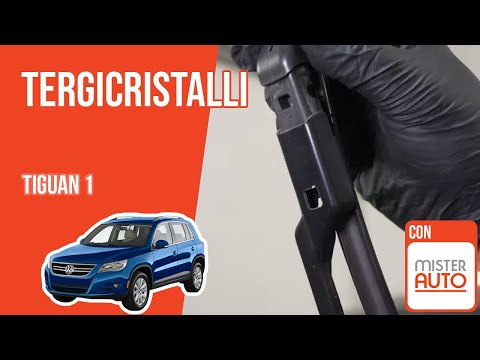 Volkswagen Tiguan (2007-2016 / 5N, MK 1)
Replacing the Wiper Blades on the Volkswagen Tiguan When the wipers on the Volkswagen Tiguan leave uncleaned areas during operation, you need to replace the blades. To do this, stop the wiper arms at the highest …Read all… Posted on 5 September 2026 by ScegliAuto 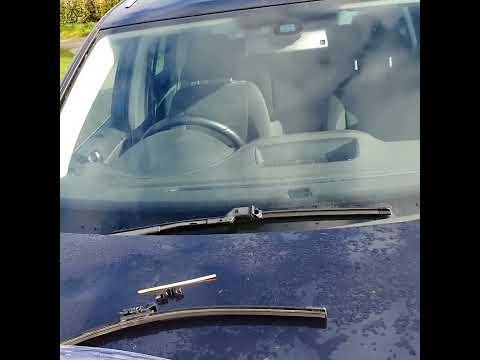 Volkswagen Tiguan (2007-2016 / 5N, MK 1)
How to replace the windscreen wiper on the Volkswagen Tiguan If you want to replace the windscreen wiper on your first-generation Volkswagen Tiguan (2007-2016), simply follow the instructions below. First, park the car …Read all… Posted on 24 August 2026 by ScegliAuto Windshield Wipers Volkswagen Tiguan (2007-2016 / 5 n, mk 1)
Volkswagen Tiguan (2007-2016 / 5N, MK 1)How to replace the windshield wiper blades of the Volkswagen Tiguan The windshield wiper blades of the Volkswagen Tiguan must be replaced at least once a year, using worn blades could damage the windshield. To replace them, we …Read all… Posted on 17 August 2025 by ScegliAuto
Volkswagen Tiguan (2016-2025 / BW, MK 2, AD)How to replace the rear windshield wiper of the 2017 Volkswagen Tiguan Today we will show you the steps to replace the rear windshield wiper blade on a 2017 Volkswagen Tiguan. Stand in front of the rear windshield of the car and …Read all… Posted on 28 May 2025 by ScegliAuto
Volkswagen Tiguan (2016-2025 / BW, MK 2, AD)How to replace the rear windshield wiper of the 2017 Volkswagen Tiguan Replacing the rear windshield wiper of your Volkswagen Tiguan (2017) is really very simple. All you have to do is carefully read the procedure described below …Read all… Posted on 23 February 2025 by ScegliAuto
Volkswagen Tiguan (2016-2025 / BW, MK 2, AD)How to replace the windshield wiper of the Volkswagen Tiguan If you want to replace the windshield wiper of your Volkswagen Tiguan on your own, just follow the procedure described in our new guide. First of all, enter …Read all… Posted on 11 July 2024 by ScegliAuto
Volkswagen Tiguan (2007-2016 / 5N, MK 1)Replacing the Wiper Blades on the Volkswagen Tiguan When the wipers on the Volkswagen Tiguan leave uncleaned areas during operation, you need to replace the blades. To do this, stop the wiper arms at the highest …Read all… Posted on 5 September 2026 by ScegliAuto
Volkswagen Tiguan (2007-2016 / 5N, MK 1)How to replace the windscreen wiper on the Volkswagen Tiguan If you want to replace the windscreen wiper on your first-generation Volkswagen Tiguan (2007-2016), simply follow the instructions below. First, park the car …Read all… Posted on 24 August 2026 by ScegliAuto Cigarette lighter (1) Airbag (6) Alternator (1) Speaker (2) Shocks (1) Antenna (3) Air conditioning (1) Car stereo (25) Roof rack bars (2) Battery (16) Ignition coil (1) Air vents (2) Transmission (4) Spark plugs (2) Glow plugs (3) Convertible top (1) Body (11) Glove compartment (2) Key (70) Trunk lock (4) Timing belt (15) V-belt (2) Air conditioner (2) A/C controls (2) Onboard computer (13) Checks and maintenance (144) Throttle body (2) Dashboard (2) Brake rotors (1) Headlight (12) Tail light (12) Fog lights (8) Air filter (8) Cabin air filter (20) Diesel fuel filter (2) Oil filter (6) Parking brake (5) Grille (3) Window switch (5) Accessory kit (3) Light bulb (10) Side marker bulb (3) Headlight bulb (24) Tail light bulb (12) Interior dome light bulb (5) Antifreeze coolant (1) Instrument panel light (1) Handle (14) Power window motor (1) Starter motor (4) Transmission fluid (3) Engine oil (9) Clock (40) Door trim panel (19) Windshield (1) Front bumper (6) Rear bumper (11) Brake pads (3) Shift knob (4) Pump (7) Fuel pump (2) Car door (6) Push button (1) Power window switch (2) Instrument cluster (11) Radiator (4) Heater core (1) Wheel (8) Fuse box (121) Seat (11) Door lock (9) Oxygen sensor (1) Side mirror (15) Rearview mirror (1) AdBlue warning light (15) Warning light – error code (36) (80) Tire pressure warning light (36) Service warning light (247) Manufacturer emblem (1) Fuel cap (10) Windshield wipers (6) Thermostat (4) Center console tunnel (2) Valve (1) Side window (1) Steering wheel (3) |
How to Connect the Cables to the Battery of the Citroen Xsara Picasso?
In this tutorial, you will see how to connect the cables to the battery of the Citroen Xsara Picasso, useful if you need to recharge it or perform an emergency start. First, ensure the key is not inserted, then open the bonnet and move to the front of the left headlamp. Next, locate the bolt just behind the filter box and connect the positive terminal clamp to it. Now you can connect the negative terminal to any point on the chassis, such as the indicated point. Once the operation is complete, ensure you disconnect the negative first and then the positive. by ScegliAuto More videos
|
|
For advertising on this site Write to info@scegliauto.com
ScegliAuto is not responsible for any inaccuracy of the data in the lists. To report any inaccuracy or your business (if you own the business in question), please write to info@scegliauto.com
Number of seconds to generate the page: 0.008
(c) ScegliAuto 2026 - info@scegliauto.com - Privacy policy VAT number: IT01247470535 |
