
|
Do it yourself
| |||
| ||||


How to Set the Time on the Volkswagen Lupo Clock
Model: Volkswagen Lupo
MK 1
- Years 1998-2005
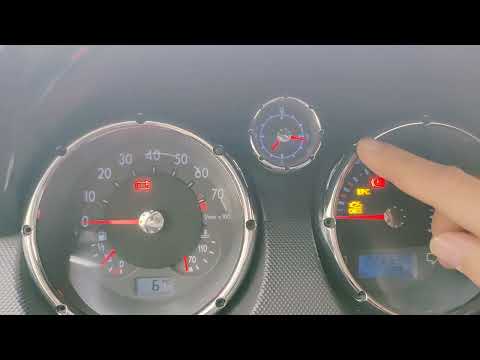
In this video, you will learn how to adjust the mechanical analogue clock present in the Volkswagen Lupo. On the plastic frame surrounding the clock glass, you will find two small holes positioned at 4 and 8 o'clock relative to the dial. They are marked with a + and - or with an 'h' and 'm'. You will need a thin tool: ideally a toothpick or a very thin screwdriver. Insert the tool into the hole marked with 'h' or + and press until you see the hour hand move forward by one hour with each press. Continue until you set the current hour; then move to the other hole and do the same for the minutes. Use gentle pressure to avoid damaging the internal mechanism; be patient, as it is a mechanical movement.
Posted on 12 August 2026 by ScegliAuto
Video tutorial
Related tutorials
Volkswagen Lupo
(1998-2005 /
MK 1)
It will be possible to change the clock displayed on the instrument panel of the Volkswagen Lupo by turning on the instrument panel and inserting the…

Volkswagen Lupo
(1998-2005 /
MK 1)
The clock adjustment on the Volkswagen Lupo is done by turning on the instrument panel, so that the buttons on the instrument panel can be used: afte…
Volkswagen Lupo
(1998-2005 /
MK 1)
To set the clock on a Volkswagen Lupo, turn on the instrument cluster to enable the buttons on it. Once the cluster is powered, press and hold the bu…
Other guides you may be interested in
|
How to Connect the Cables to the Battery of the Citroen Xsara Picasso?
In this tutorial, you will see how to connect the cables to the battery of the Citroen Xsara Picasso, useful if you need to recharge it or perform an emergency start. First, ensure the key is not inserted, then open the bonnet and move to the front of the left headlamp. Next, locate the bolt just behind the filter box and connect the positive terminal clamp to it. Now you can connect the negative terminal to any point on the chassis, such as the indicated point. Once the operation is complete, ensure you disconnect the negative first and then the positive. by ScegliAuto More videos
|
|
For advertising on this site Write to info@scegliauto.com
ScegliAuto is not responsible for any inaccuracy of the data in the lists. To report any inaccuracy or your business (if you own the business in question), please write to info@scegliauto.com
Number of seconds to generate the page: 0.094
(c) ScegliAuto 2026 - info@scegliauto.com - Privacy policy VAT number: IT01247470535 |
