
|
Do it yourself
| |||
| ||||


Front Wheel Bearing Replacement
Model: Volkswagen Jetta
MK 5, A5
- Years 2005-2010
Obtain replacement bearings. Lift the vehicle, secure it, and remove the wheel. Dismantle the entire brake assembly to free the shaft. Remove the brake disc by first taking off the metal cover protecting the bolt, which must then be undone. With a few well-placed strikes, release the brake disc. Remove the driveshaft, then take out the roller bearing from the hub. Clean thoroughly to remove old grease. Correctly reposition the new steel bearing ring, then place the new bearing inside after properly greasing it. Grease the bearing with your hand to ensure the grease penetrates deeply. Clean the wheel shaft of old grease, reassemble the disc after greasing, and refit the wheel retaining bolt. Spin the wheel by hand to check for any friction or abnormal play. Tighten the retaining screw on the hub nut. Clean the cover from old grease and fill it with new grease. Reposition the hub protection cover. Reassemble the brake caliper and the wheel.
Updated on 6 February 2026 by ScegliAuto
Video tutorial
Related tutorials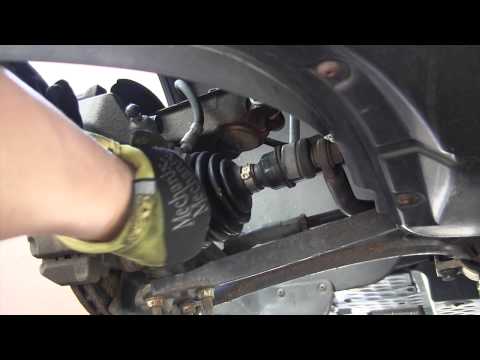
Volkswagen Jetta
(2005-2010 /
MK 5, A5)
If the front hub bearing is damaged, you will hear noise coming from the wheel (especially when turning), and if the damage is significant, the wheel…

Volkswagen Jetta
(2005-2010 /
MK 5, A5)
Below are the instructions for removing and replacing the front wheel bearing on the Volkswagen Jetta. First, lift the vehicle and remove the front w…

Volkswagen Jetta
(1979-1991 /
)
Obtain replacement bearings identical to the originals. Lift the vehicle, secure it, and remove the wheel. Dismantle the entire brake assembly to fre…
Other guides you may be interested in
|
How to Connect the Cables to the Battery of the Citroen Xsara Picasso?
In this tutorial, you will see how to connect the cables to the battery of the Citroen Xsara Picasso, useful if you need to recharge it or perform an emergency start. First, ensure the key is not inserted, then open the bonnet and move to the front of the left headlamp. Next, locate the bolt just behind the filter box and connect the positive terminal clamp to it. Now you can connect the negative terminal to any point on the chassis, such as the indicated point. Once the operation is complete, ensure you disconnect the negative first and then the positive. by ScegliAuto More videos
|
|
For advertising on this site Write to info@scegliauto.com
ScegliAuto is not responsible for any inaccuracy of the data in the lists. To report any inaccuracy or your business (if you own the business in question), please write to info@scegliauto.com
Number of seconds to generate the page: 0.062
(c) ScegliAuto 2026 - info@scegliauto.com - Privacy policy VAT number: IT01247470535 |
