
|
Do it yourself
| |||
| ||||


How to Install LED Rear Lights on a Volkswagen Golf 7
Model: Volkswagen Golf
Golf VII, MK 7, Golf 7
- Years 2012-2019
In this video tutorial, you will see how to install the LED bulbs for the rear light (rear indicators) of a Volkswagen Golf 7, following a few simple steps that will guide you towards proper management of your vehicle. The first step is to lift the tailgate; if you look inside the boot on the side, there is a notch that you need to lift; underneath, there is a screw that you need to turn until it is completely unscrewed. After that, you can pull out the light unit. Once the light unit is detached, disconnect the cables. If it is very dirty, you can clean it with a soft cloth. At this point, you need to replace the halogen bulb with the LED one. Before reassembling everything, test to check if the LED bulb works correctly. If it works well, reassemble all parts in reverse order.
Updated on 9 July 2026 by ScegliAuto
Video tutorial
Related tutorials
Volkswagen Golf
(2012-2019 /
Golf VII, MK 7, Golf 7)
In this video we will see how to disassemble the rear lights of the Volkswagen Golf 7, not because they are damaged or there is any other problem tha…

Volkswagen Golf
(2012-2019 /
Golf VII, MK 7, Golf 7)
In this tutorial, we will see how to disassemble the rear lights on a Volkswagen Golf, a very simple and quick operation. First of all, let's make su…
Volkswagen Golf
(2008-2012 /
MK 6, Golf VI, Golf 6, 5K1)
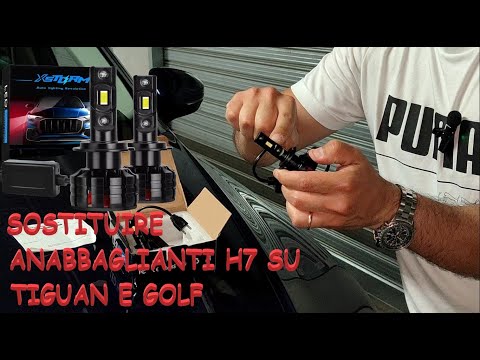
The video described here is useful for those who want to replace their halogen bulbs with more modern LED ones. As explained verbally and shown, a co…
Other guides you may be interested in |
How to Connect the Cables to the Battery of the Citroen Xsara Picasso?
In this tutorial, you will see how to connect the cables to the battery of the Citroen Xsara Picasso, useful if you need to recharge it or perform an emergency start. First, ensure the key is not inserted, then open the bonnet and move to the front of the left headlamp. Next, locate the bolt just behind the filter box and connect the positive terminal clamp to it. Now you can connect the negative terminal to any point on the chassis, such as the indicated point. Once the operation is complete, ensure you disconnect the negative first and then the positive. by ScegliAuto More videos
|

|
For advertising on this site Write to info@scegliauto.com
ScegliAuto is not responsible for any inaccuracy of the data in the lists. To report any inaccuracy or your business (if you own the business in question), please write to info@scegliauto.com
Number of seconds to generate the page: 0.058
(c) ScegliAuto 2026 - info@scegliauto.com - Privacy policy VAT number: IT01247470535 |
