
|
Do it yourself
| |||
| ||||


How to install an AUX-IN socket on a Volvo S40 II
Model: Volvo S40
MK 2
- Years 2004-2012
Let's see how to install an AUX-IN socket on a Volvo S40-II: the AUX-IN port is already present, although not activated, on the Volvo S40 and V50, which share the same interior. We can find the kit on AliExpress with the code 1005006068464764 at a price of 7.19 euros, with free delivery for purchases over 20 euros. We open the central cup holder, lift the trim surrounding the handbrake, which is only fixed by pressure clips. Once the tunnel trim is removed, we will see the black frame surrounding the radio and air conditioning: we firmly grasp it with our hands and pull it towards us; we remove the 4 screws that secure the radio unit, extract it from its housing, disconnect all the connectors (take a photo to make sure to reattach them all in the right place) and find the AUX port which is a 10 PIN square with the AUX label. We insert the connector into this port, make sure the power cable is properly connected, wrap the module in some soundproofing material and insert it into an empty space behind the radio. Reconnect all the connectors, put the radio back in its housing, tighten the screws and reassemble the frame and tunnel. All that's left is to do the practical test!
Posted on 27 October 2025 by ScegliAuto
Video tutorial
Related tutorials
Volvo S40
(2004-2012 /
MK 2)
To access the fuse box on your Volvo S40, follow the simple procedure described in this guide. First, ensure you park on a flat surface and completel…
Volvo S40
(2004-2012 /
MK 2)
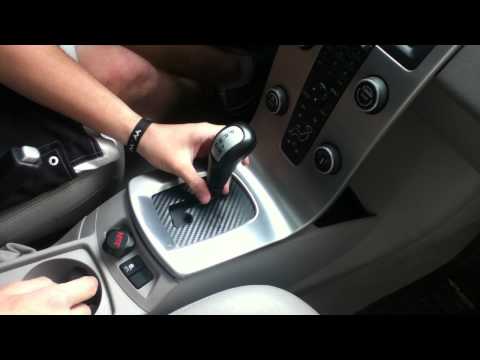
These short and simple instructions will show us how to disassemble and replace the gear shift knob of the Volvo S40. First of all, we get into the c…

Volvo S40
(1995-2004 /
MK 1)
To gain free access to the OBD port of your first-generation Volvo S40, simply follow the procedure described in the following guide. First, you need…
Other guides you may be interested in
|
How to Check the Oil Level on a Jeep Renegade?
To check the oil level on a Jeep Renegade, you need to open the bonnet to access the components inside the engine bay: on the lower left side of the engine block, you will find the dipstick for checking the level. This should be pulled out and thoroughly cleaned with a cloth: once cleaned, reinsert it back into its tube and pull it out immediately after. This way, you can check that the oil mark is between the minimum and maximum levels; finally, you can place the dipstick back in its tube. by ScegliAuto More videos
|

|
For advertising on this site Write to info@scegliauto.com
ScegliAuto is not responsible for any inaccuracy of the data in the lists. To report any inaccuracy or your business (if you own the business in question), please write to info@scegliauto.com
Number of seconds to generate the page: 0.056
(c) ScegliAuto 2026 - info@scegliauto.com - Privacy policy VAT number: IT01247470535 |
