
|
Do it yourself
| |||
| ||||


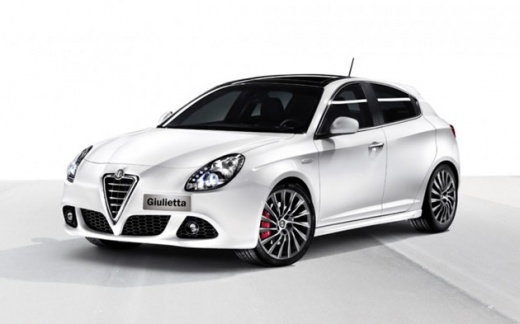
How to Remove the Front Headlamp on Alfa Romeo Giulietta
Model: Alfa Romeo Giulietta
MK 1
- Years:
2010, 2011, 2012, 2013, 2014, 2015, 2016, 2017, 2018, 2019, 2020
Video tutorial
To remove the front headlamp on an Alfa Romeo Giulietta, first unscrew the four bolts that secure the top of the bumper to the crossmember between the two headlamps. This will facilitate the extraction of the headlamp once removed. The headlamp is secured to the vehicle by two bolts; the first is visible at the top near the wing and is easily accessible, while the second is located at the bottom of the headlamp, accessible only by widening the wheel arch. For easier access, turn the wheels in the opposite direction to the headlamp positioning, and once the wheel arch is widened, you can access the rear to remove the second bolt securing the headlamp to the inner wing. After removing the two bolts, simply widen the top of the bumper where the four bolts were previously removed to extract it from its housing. Once the headlamp is removed, disconnect the two power connectors to completely take it out of the vehicle, and at this point, you can proceed with replacing the bulbs or the entire headlamp if necessary.
Updated on 13 March 2026 by ScegliAuto
Related tutorials
Alfa Romeo Giulietta
(2010-2020 /
MK 1)
In this video tutorial, you will learn how to remove and replace the front headlight bulb, as well as how to disassemble the front headlight, on the …

Alfa Romeo Giulietta
(2010-2020 /
MK 1)
Here’s how to remove the front headlight on an Alfa Romeo Giulietta: open the bonnet by pulling the release lever and secure it. Unscrew the securing…

Alfa Romeo Giulietta
(2010-2020 /
MK 1)
Learn how to proceed with the removal of the front headlamp bulbs on an Alfa Romeo Giulietta. Open the bonnet by pulling the bonnet release lever and…
Other guides you may be interested in
|
How to Open the Hood of the BMW X3
Today, you will learn how to open and close the hood of the BMW X3. To perform this simple operation, lift the hood release lever located next to the door seal on the driver’s side. After pulling the lever, you will notice that the hood will lift slightly. Position yourself in front of the hood and lift it after moving the internal lever from left to right. To keep the hood secure during maintenance, use the side support rod. To close the hood, simply let it fall back into place. by ScegliAuto More videos
|
|
For advertising on this site Write to info@scegliauto.com
ScegliAuto is not responsible for any inaccuracy of the data in the lists. To report any inaccuracy or your business (if you own the business in question), please write to info@scegliauto.com
Number of seconds to generate the page: 0.017
(c) ScegliAuto 2026 - info@scegliauto.com - Privacy policy VAT number: IT01247470535 |
