
|
Do it yourself
| |||
| ||||


Honda CR-V - Video tutorial
Model: Honda CR-V
MK 3
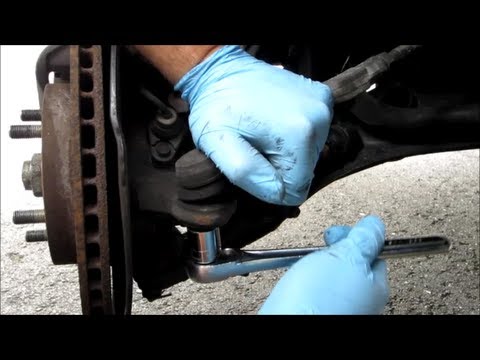
- Years 2007-2012 First we remove the wheel, slightly unscrew the nut that is located between the tie rod and the steering box cap, then remove the stop behind the brake disc in the lower part, after removing the stop we proceed to unscrew the nut and with a hammer hit on the bracket until the tie rod comes off. Now unscrew the tie rod paying attention to how many turns you make to put the new one back with the same turns, to prevent the machine from pushing too much on one side. With pliers, press on the cap stops to move it to have the possibility to unscrew the other part of the tie rod as well, when unscrewing the nut that is before the cap, remember to first take the distance of the thread. Once the hood has been removed, the tie rod can be removed by pushing it outwards. Now you can put the new one back on and reassemble everything remembering the distance of the central nut and the turns of the external tie rod. And so you have replaced the tie rod of your HONDA Cr-V.
Posted on 25 September 2023 by ScegliAuto
 Steering box tie rod replacement
Honda CR-V (1995-2001 / MK 1) Before proceeding with the disassembly operations, it is suggested to obtain a ball joint extractor necessary to remove the articulated head from its 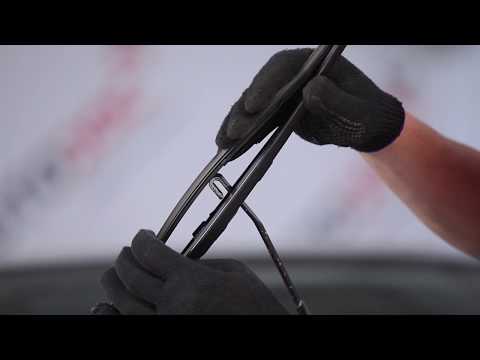 How to replace the front wiper blade on Honda CR V [USA]
Honda CR-V (2012-2017 / MK 4) To replace the Honda CR-V front wiper blade, proceed as follows: lift the rod that supports the wiper blade, rotate the blade, orient it with the rub  Change the hood rod? Simple! Here's how to do it.
Honda CR-V (2007-2012 / MK 3) An element as banal as it is essential to guarantee the correct execution of the opening and closing operations of the front bonnet is the rod which Other guides that may interest you |
Disassembly of the gear knob on the Lancia Ypsilon 2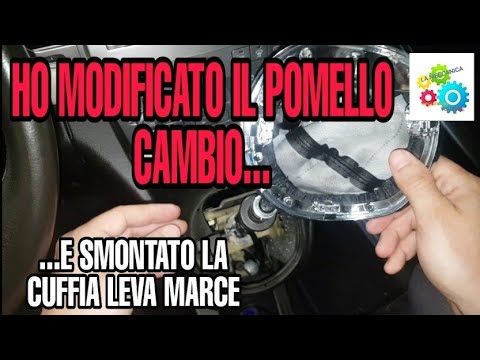
Today we will see, in this video tutorial, how to remove and replace the gear knob on the second series Lancia Ypsilon, but also on the Lancia Musa, in simple and quick steps. We get inside the car and start by removing the old gear knob; to do this, just unscrew it anticlockwise, as shown in the video. At this point we also remove the gearshift gaiter, in order to replace, if necessary, it too; we just have to fix the new headset and insert the new gear knob, screwing it correctly and without creating play on the gear lever! by ScegliAuto More videos
|
|
For advertising on this site Write to info@scegliauto.com
ScegliAuto is not responsible for any inaccuracy of the data in the lists. To report any inaccuracy or your business (if you own the business in question), please write to info@scegliauto.com
Number of seconds to generate the page: 0.043
(c) ScegliAuto 2024 - info@scegliauto.com - Privacy Policy VAT number: IT01247470535 |