
|
Do it yourself
| |||
| ||||



How to Fit the Dipped Beam Bulb on a Hyundai Tucson
Model: Hyundai Tucson
MK 3, TL
- Years:
2015, 2016, 2017, 2018, 2019, 2020, 2021
Video tutorial
In this video tutorial, you can see how to fit the dipped beam bulb on the passenger side of a Hyundai Tucson, following simple steps that will guide you in managing your vehicle correctly. First, secure your vehicle with the handbrake engaged, then lift the bonnet and secure it with the appropriate prop. You can find the dipped beam bulb (passenger side) by unscrewing the protective cap from the weather. Then, simply turn the dust cover and set it aside. Now reach inside the headlamp where the bulb is located; turn the bulb towards the driver's side and pull it back to remove it from its socket. Now disconnect the electrical connector, replace the blown bulb with a new one, and reassemble all parts in reverse order.
Updated on 16 June 2026 by ScegliAuto
Related tutorials
Hyundai Tucson
(2015-2021 /
MK 3, TL)
Here are the necessary steps to replace the dipped beam bulb in the front headlight of the Hyundai Tucson. First, open the bonnet and remove the plas…

Hyundai Tucson
(2015-2021 /
MK 3, TL)
As shown in this tutorial, replacing the dipped beam bulbs in a Hyundai Tucson is a very simple and quick operation. Before proceeding, ensure that t…

Hyundai Tucson
(2015-2021 /
MK 3, TL)
These short and simple steps will show us how to disassemble and replace the headlight bulb of the Hyundai Tucson. First, we open the hood of the car…
ScegliAuto offers an extensive international collection of automotive tutorials available in 12 languages. Each guide combines instructional videos with original explanations written by experienced human editors, along with information about the car models covered.
Other guides you may be interested in |
What does the "Code 82" message indicate in the Chevrolet Orlando and how to remove it?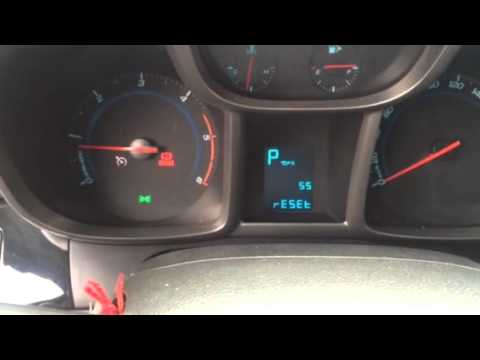
If the "Code 82" message appears on the dashboard of your Chevrolet Orlando, it means that the service interval in miles or time has been reached. Once all scheduled maintenance tasks are completed, you can remove the warning by following the simple procedure shown in this tutorial. First, insert the key and turn on the ignition, then press the "MENU" button located on the left control stalk and navigate to the screen displaying the "Reset" option. At this point, press the "SET/CLR" button at the end of the same stalk and confirm the reset. by ScegliAuto More videos
|
|
For advertising on this site Write to info@scegliauto.com
ScegliAuto is not responsible for any inaccuracy of the data in the lists. To report any inaccuracy or your business (if you own the business in question), please write to info@scegliauto.com
Number of seconds to generate the page: 0.010
(c) ScegliAuto 2026 - info@scegliauto.com - Privacy policy - About us VAT number: IT01247470535 |
