
|
Do it yourself
| |||
| ||||


Changing the Cabin Air Filter
Model: Kia Carens
MK 2
- Years 2006-2013
Changing the pollen filter in your car is very important as it protects against external agents entering the cabin and helps the vehicle's ventilation system function better. It is also crucial to replace it at regular intervals to preserve the health of the driver and passengers. It is advisable to replace the filter every 10,000 miles or once a year. There are various filters available at different prices and good quality. Usually, this operation is quite simple and can be done in about 10-15 minutes. The filter is located beneath the glove compartment.
Updated on 22 February 2026 by ScegliAuto
Video tutorial
Related tutorials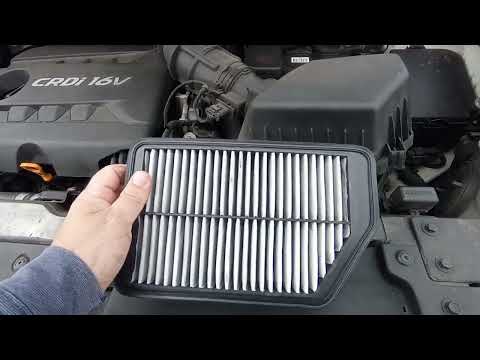
Kia Carens
(2013-2019 /
MK 3)
In this video we see how to change the cabin air filter on the Kia Carens: we open the hood, and here we find the filter which is located right under…

Kia Carens
(2013-2019 /
MK 3)
The air filter light activates on the dashboard or onboard computer of the Kia Carens when manual purification of the filter is required. To perform …

Kia Carens
(2022-2026 /
MK 4)
In this video we can see how to reset, after changing it, the cabin air filter of the Kia Carens. The PuriFire filter - that's its name - is a very a…
Other guides you may be interested in
|
Removing the Timing Belt on a Suzuki Vitara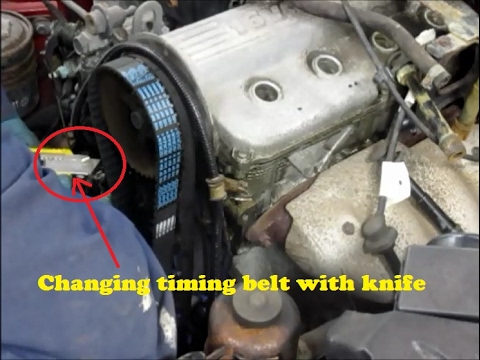
In this video, see the removal and replacement of the timing belt and water pump on a Suzuki Vitara. Open the bonnet and lift it, securing it in place. Use a socket wrench to remove the cooling radiator along with the associated hoses. Disconnect the power wiring using pliers, and remove the plastic undertray with a screwdriver. Use a spanner to loosen the tensioner pulley and slide the belt off its seat. Use a socket wrench to unscrew the tensioner pulley bolt, and remove the water pump as shown in the video. Fit the new water pump, the tensioner, and the belt itself, tightening everything with the socket wrench. Finally, reinstall the radiator with the securing bolts. by ScegliAuto More videos
|
|
For advertising on this site Write to info@scegliauto.com
ScegliAuto is not responsible for any inaccuracy of the data in the lists. To report any inaccuracy or your business (if you own the business in question), please write to info@scegliauto.com
Number of seconds to generate the page: 0.123
(c) ScegliAuto 2026 - info@scegliauto.com - Privacy policy VAT number: IT01247470535 |