
|
Do it yourself
| |||
| ||||


Model: Lml Star
To replace the front brake pads on an LML Star, it is advisable to first remove the wheel from the hub using the five nuts located on the inside, this operation is not necessary but will make removing the caliper much easier. After removing the wheel, proceed to remove the caliper by unscrewing the two bolts that secure it in place. Once the caliper is removed, you will notice a small plastic cover that protects the pads from dirt, which can be easily removed by prying with a screwdriver. Removing the cover will give access to the pin that holds the pads in place, which is secured with a small circlip that must be removed to extract the pin. Beneath the securing pin, there will also be a metal spring, and it is advisable to memorise its position before removing the pin to avoid unpleasant surprises during reassembly. After extracting the securing pin, the pads and the spring will come out of the caliper, and before inserting the new ones, push the pistons back into the caliper to regain working space. This can be done by inserting a lever or screwdriver inside the caliper and applying force between the two pistons to push them back into their housing. Once the pistons are retracted, proceed to insert the new pads into the caliper, ensuring they are positioned as they were during removal, then reinsert the metal spring and secure everything with the main pin, ensuring not to forget to replace the circlip that secures the pin and the plastic cover.
Updated on 8 March 2026 by ScegliAuto
Video tutorial
Related tutorials
Star
In this tutorial video, we will see how to remove and replace the front brake pads of an LML Star and a Vespa PX. To remove the pads, first take off …

Star
To replace the front brake disc and pads of the LML Star, first loosen the nut that secures the front wheel to its forks. Once the nut is loosened, r…

Star
To replace the clutch release bearing on the LML Star, first loosen the screws securing the left side cover of the motorcycle near the rear wheel: by…
|
How to Replace the Battery in a Yamaha Vino 125 Scooter?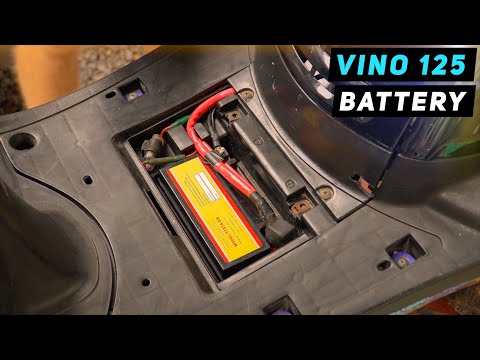
In this tutorial, you will see how to replace the battery in a Yamaha Vino 125 scooter, a very simple and quick operation. First, ensure that the key is not inserted for safety. Then, lift the rubber mat and, using a simple cross-head screwdriver, unscrew the two screws securing the plastic cover. Once opened, disconnect both terminals, starting with the negative, and remove the battery from its housing. To fit the replacement, simply follow the reverse procedure. by ScegliAuto More videos
|
|
For advertising on this site Write to info@scegliauto.com
ScegliAuto is not responsible for any inaccuracy of the data in the lists. To report any inaccuracy or your business (if you own the business in question), please write to info@scegliauto.com
Number of seconds to generate the page: 0.006
(c) ScegliAuto 2026 - info@scegliauto.com - Privacy policy VAT number: IT01247470535 |
