
|
Do it yourself
| |||
| ||||


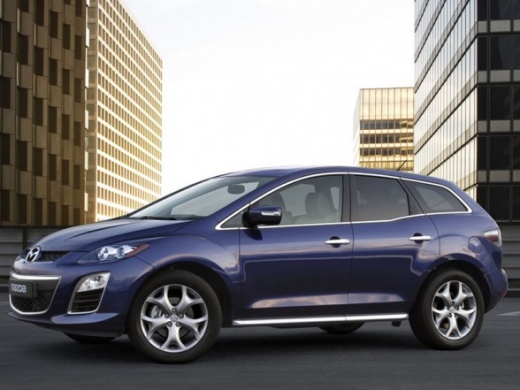
Remove the Door Panel at Home
Model: Mazda Cx 7
MK 1
- Years:
2006, 2007, 2008, 2009, 2010, 2011, 2012
Video tutorial
To replace the window motor or for any other reason related to the door panel, you need to disassemble it. This operation is quite simple even for those not very familiar with mechanics: you just need a few tools and a bit of patience. Start by removing the handle: using a screwdriver or a thin plastic tool, remove the plastic cover, then the screw. Still using a plastic tool, the same as before (if you used one), remove the plastic on the right side of the window, then do the same with the plastic under the armrest; underneath it, you will find two bolts. Using the thin tool or a small screwdriver, gently pry the right (or left) side of the door to start detaching the panel, but do not pull it as there are still the wiring for the motor, the handle, and the lower bulbs. Disconnect all of them after removing the bulb under the door and take off the plastic panel. Now you can work inside; this video shows how to change the motor by removing the 3 bolts that support it and following the procedure already explained in another tutorial on this site. Once you have done what you need, reassemble everything by following the procedure in reverse. The important thing to do this job without issues is to be careful not to break the plastics by over-prying.
Updated on 9 February 2026 by ScegliAuto
Related tutorials
Mazda Cx 7
(2006-2012 /
MK 1)
This guide explains how to remove the door panel of your car. With a bit of dedication and passion, DIY is possible. The door panel is not difficult …

Mazda Cx 7
(2006-2012 /
MK 1)
Below are the steps that will allow you to remove and replace the front door panel of the Mazda CX-7. First, open the front door and start unscrewing…

Mazda Cx 7
(2006-2012 /
MK 1)
This guide outlines the steps to remove the rear door panel of the Mazda CX-7. First, open the rear door of the vehicle and start unscrewing the fast…
ScegliAuto offers an extensive international collection of automotive tutorials available in 12 languages. Each guide combines instructional videos with original explanations written by experienced human editors, along with information about the car models covered.
Other guides you may be interested in
|
How to Replace the Front Headlamp Bulb in a Kia Stonic?
Regardless of the type of bulb to be used, for example, the video shows how to install an H7 in a headlamp that involves similar work steps to the Kia Stonic, it is important to ensure that the instrument panel and lights are turned off. To replace the front headlamp bulb on the vehicle in question, open the bonnet, remove the plastic rear cap of the headlamp unit, unclip the metal fastener, and extract the bulb holder. Finally, simply remove the bulb to be replaced from the holder, insert the new one, and reassemble everything. by ScegliAuto More videos
|
|
For advertising on this site Write to info@scegliauto.com
ScegliAuto is not responsible for any inaccuracy of the data in the lists. To report any inaccuracy or your business (if you own the business in question), please write to info@scegliauto.com
Number of seconds to generate the page: 0.016
(c) ScegliAuto 2026 - info@scegliauto.com - Privacy policy - About us VAT number: IT01247470535 |
