
|
Do it yourself
| |||
| ||||


Instructions for Removing the Front Bumper
Model: Mini Mini
R53, R50, R52
- Years 2001-2007
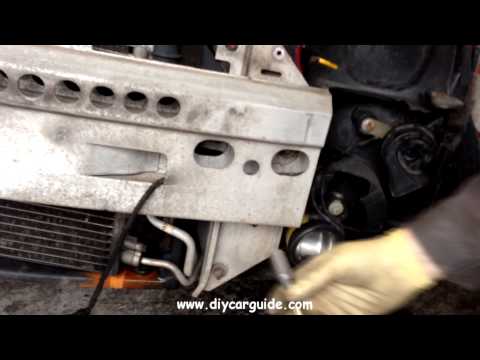
Open the front bonnet and unscrew the Torx screws that secure the bumper to the front crossmember; additional screws are located along the lower edge; another pin is located beneath the wheel arch (one for each side), and to unscrew it, you will need a long T or socket wrench. Then, pull the bumper away from its position and disconnect the power connectors for the fog lights, indicators, and temperature sensor. Before refitting the bumper, you can adjust the support brackets that have a central slot with a spring that allows you to set the position of the bumper relative to the bonnet.
Updated on 10 February 2026 by ScegliAuto
Video tutorial
Related tutorials
Mini
(2007-2014 /
R55, R57, R56)
Today's video will show us the process of disassembling and replacing the front bumper of the Mini Cooper, following the instructions provided below.…

Mini
(2001-2007 /
R53, R50, R52)
Today we will discover the main steps useful for disassembling and replacing the front bumper of the Mini Cooper. First, we open the hood and start r…
Mini
(2001-2007 /
R53, R50, R52)
Using a ratchet spanner, start by removing the screws inside the engine bay. Lift the vehicle and unscrew all the screws; the anchor points are distr…
Other guides you may be interested in
|
How to Replace the Air Temperature Sensor on an Opel Astra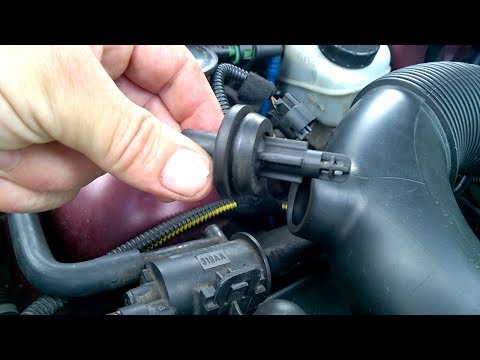
Are you having problems with the engine air temperature? Is the sensor in the engine not working anymore? Let’s see how to properly remove and replace the air temperature sensor on an Opel Astra. Open the bonnet, lift it and secure it. Disconnect the power connector of the sensor (located on the air hose) with your fingers, then remove the valve from its seat. After comparing the damaged valve with the new one, fit it onto the air hose in the engine bay. Test the car for proper operation. by ScegliAuto More videos
|
|
For advertising on this site Write to info@scegliauto.com
ScegliAuto is not responsible for any inaccuracy of the data in the lists. To report any inaccuracy or your business (if you own the business in question), please write to info@scegliauto.com
Number of seconds to generate the page: 0.057
(c) ScegliAuto 2026 - info@scegliauto.com - Privacy policy VAT number: IT01247470535 |