
|
Do it yourself
| |||
| ||||


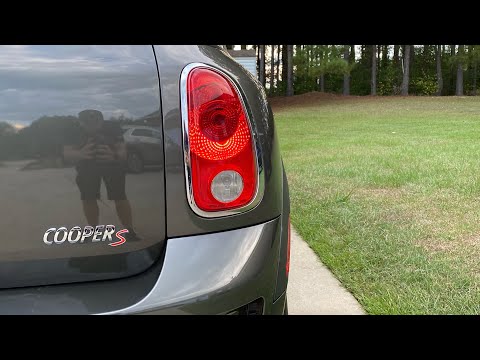
Removal of the rear light of the Mini Countryman
Model: Mini Mini
R60, Countryman1
- Years 2010-2016
In this guide we see the procedure on how to disassemble and replace the rear light of the Mini Countryman, following the instructions below. First we open the tailgate of the trunk and begin to remove the side plastic cover; then we find the screws on the back of the headlight, to be unscrewed to remove the same headlight, as shown in the video. At this point we disconnect the electrical connector of the bulbs to remove and replace the headlight with the new one (or replace the bulbs only); then we put everything back together, applying the reverse procedure!
Posted on 10 August 2022 by ScegliAuto
Video tutorial
Related tutorials
Mini
(2010-2016 /
R60, Countryman1)
In order to replace the rear headlight bulb of the Mini Countryman, you need to open the rear hatch so that you can locate the interior panel of the …
Mini
(2010-2016 /
R60, Countryman1)
Before we are able to begin, we will have to open the tailgate of our Mini Countryman. Let's start by disengaging and removing the internal side cove…

Mini
(2010-2016 /
R60, Countryman1)
Let's start by highlighting the model of car visible in the video, namely the classic Mini, which for the disassembly procedures of the rear lights a…
Other guides you may be interested in
|
How to Remove the Tailgate Handle on a Nissan Qashqai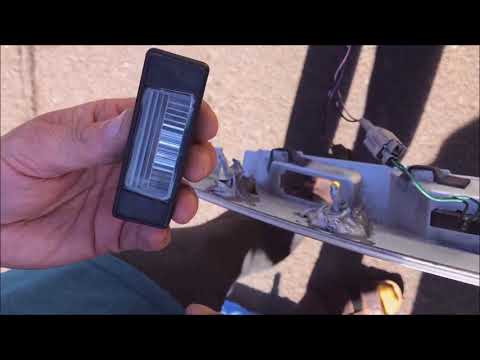
Follow these steps to remove the tailgate handle on a Nissan Qashqai to replace the number plate bulbs. First, open the rear tailgate of the car, then unscrew the screws on the plastic trim of the tailgate using a screwdriver (remove the plastic rivets). Detach the plastic trim from the tailgate, unscrew the securing bolts of the external handle with a screwdriver. Finally, remove the tailgate handle by hand. Take the new part and disassemble the number plate light. Reassemble everything in reverse order. by ScegliAuto More videos
|

|
For advertising on this site Write to info@scegliauto.com
ScegliAuto is not responsible for any inaccuracy of the data in the lists. To report any inaccuracy or your business (if you own the business in question), please write to info@scegliauto.com
Number of seconds to generate the page: 0.059
(c) ScegliAuto 2026 - info@scegliauto.com - Privacy policy VAT number: IT01247470535 |