
|
Do it yourself
| |||
| ||||


How to repair the rear trunk handle of the Nissan Qashqai
Model: Nissan Qashqai
J11
- Years 2014-2022
In this video, we see how to repair the rear door handle of the Nissan Qashqai: first, we remove the damaged outer handle, disconnecting the electrical contacts as well. Then, we open the tailgate and remove the inner handle, for which we need to remove the plastic inner cover of the tailgate. Once this piece is removed, we will remove the bolts from the inside that held the outer handle. Certainly, the easiest thing to do would be to buy a new piece and replace it, but we want to repair it, so we purchased two plastic supports on Amazon with the code B07Z8WS3KB at a price of 14.27 euros + 6.03 euros for delivery; this is to reinforce the handle, then we cleaned it from all the poorly made repairs it had and now we are going to repair it properly. We remove all the protruding parts, then sand it with sandpaper, and glue the two pieces together, which have a specific place where they need to be positioned (it is clearly visible from the fit); we also sand the new pieces well with sandpaper and then apply the glue, letting it dry for about ten minutes before attaching the pieces, let it dry well and then attach the clips. Attach the bolts from the inside, put the panel back in place with the inner handles and reattach the handle in its place, connecting the bolts, clips, and electrical connector. And that's it.
Posted on 23 May 2025 by ScegliAuto
Video tutorial
Related tutorials
Nissan Qashqai
(2006-2014 /
J10)
In this tutorial we can see how to repair the tailgate handle of the Nissan Qashqai, an extremely simple operation and a very common problem in this …

Nissan Qashqai
(2006-2014 /
J10)
In this tutorial we can see how to repair the tailgate handle of the Nissan Qashqai, a very common problem for this model. To do this, we will need t…

Nissan Qashqai
(2006-2014 /
J10)
In this tutorial we can see how to repair the tailgate handle of the Nissan Qashqai, an extremely simple and quick operation. To do this we will need…
Other guides you may be interested in
|
How to set the clock on the Opel Zafira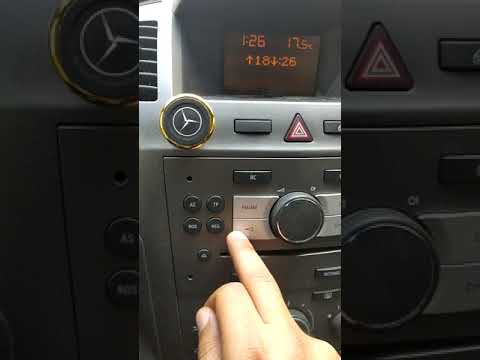
Setting the clock to the current Italian time on an Opel Zafira model B vehicle is a very simple operation, which can also be done independently thanks to our short instructional video. The first thing to do is to turn on the instrument panel and then press the SETTING button, located on the central dashboard. Once inside the menu, use the buttons to navigate to the clock setting. Change the hours and minutes and restart the instrument panel. If the clock is not updated, a diagnosis may be necessary at the radio or vehicle control unit. by ScegliAuto More videos
|

|
For advertising on this site Write to info@scegliauto.com
ScegliAuto is not responsible for any inaccuracy of the data in the lists. To report any inaccuracy or your business (if you own the business in question), please write to info@scegliauto.com
Number of seconds to generate the page: 0.141
(c) ScegliAuto 2026 - info@scegliauto.com - Privacy policy VAT number: IT01247470535 |
