
|
Do it yourself
| |||
| ||||


Where to Find the Crankshaft Position Sensor on the Opel/Vauxhall Movano
Model: Vauxhall Movano
MK 2, Movano B
- Years 2010-2021
In this video, learn how to locate the crankshaft position sensor on the Opel/Vauxhall Movano. You need to get underneath the van and search for it because it is really difficult to find and very complicated to access. Once you find the sensor, which is located near that metal plate with the engraved numbers shown in the video, it is quite challenging to get your hand or a pair of pliers in there to disconnect the electrical connector. In the comments, many people reported having great difficulty performing this operation, which became necessary due to a red warning light flashing on the dashboard. In some cases, starting the vehicle was completely prevented due to the failure of this sensor.
Updated on 24 July 2026 by ScegliAuto
Video tutorial
Related tutorials
Vauxhall Movano
(2010-2021 /
MK 2, Movano B)
In this video we can see where the battery of the Opel/Vauxhall Movano (but also of the Nissan NV400) is located. It is actually located inside the t…

Vauxhall Movano
(2010-2021 /
MK 2, Movano B)
On the Opel Movano, all fuses are located inside the three fuse boxes that are installed inside the vehicle: the first one is located on the right si…
Vauxhall Movano
(2010-2021 /
MK 2, Movano B)
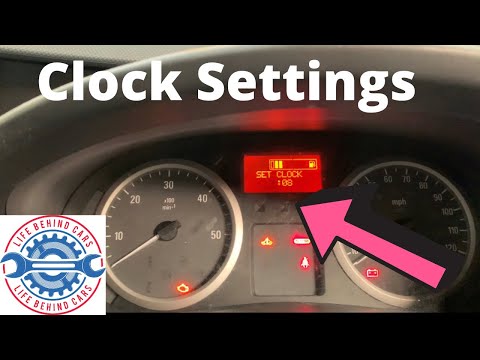
To set the time on an Opel Movano, first turn on the instrument panel without starting the engine. Press the button located at the end of the wiper l…
Other guides you may be interested in
|
How to Replace the External Wing Mirror on a Ford C MAX
In the event of a breakage, it will be necessary to replace the external wing mirror on the 2011 Ford C MAX. This operation is easily performed independently. Start by removing the internal cover of the mirror with a plastic lever. Then, use a socket wrench to remove the securing pins. Once the pins are removed, you can take off the mirror, but not before disconnecting the power connectors. Then proceed to fit the new mirror. First, connect the connectors and then secure the mirror to its housing with the pins. Refit the plastic cover and test the operation of the electric mirror using the controls. by ScegliAuto More videos
|
|
For advertising on this site Write to info@scegliauto.com
ScegliAuto is not responsible for any inaccuracy of the data in the lists. To report any inaccuracy or your business (if you own the business in question), please write to info@scegliauto.com
Number of seconds to generate the page: 0.231
(c) ScegliAuto 2026 - info@scegliauto.com - Privacy policy VAT number: IT01247470535 |
