
|
Do it yourself
| |||
| ||||



How the Onboard Computer of the Peugeot 1007 Works
Model: Peugeot 1007
MK 1
- Years:
2005, 2006, 2007, 2008, 2009, 2010
Video tutorial
Let's see how the onboard computer (or MID instrument panel) of the Peugeot 1007 works. Everything is managed with two buttons on the left wiper stalk (the lever behind the steering wheel). The round button (END) is used to select functions, while the "trigger" button (TRIP) is used to reset data. Pressing the END button cycles through these functions in a loop: "date and time"; "remaining range" estimating the kilometres that can still be travelled; "trip meter" mileage since the last reset, which resets with the TRIP trigger; "average fuel consumption"; "instantaneous consumption" real-time consumption; average speed; CD player. In the centre of the dashboard, you will also find the external temperature indicator; climate control info; radio stations; car alerts.
Posted on 8 February 2026 by ScegliAuto
Related tutorials
Peugeot 1007
(2005-2010 /
MK 1)
In order to program the key of the Peugeot 1007, you need to insert the blank key into the corresponding slot: once this is done, you can proceed by …

Peugeot 1007
(2005-2010 /
MK 1)
To program the key for a Peugeot 1007, insert the blank key into the corresponding ignition barrel. Once the key is inserted, connect a diagnostic to…
Peugeot 1007
(2005-2010 /
MK 1)
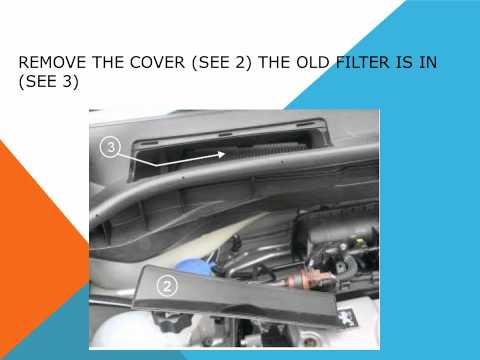
In this guide for your Peugeot 1007, you will discover where the cabin air filter is located and how to replace it quickly and safely. First, turn of…
Other guides you may be interested in
|
How to Set the Time on the Central Display of the Toyota Yaris
Today, let's look at the instructions for adjusting the clock on the central display of the Toyota Yaris. First, get in the vehicle and turn on the instrument panel; then press and hold the button located to the right of the panel (next to the clock) until the time display starts to flash, as shown in the video. Now adjust the hour first, followed by the minutes, using the same button; finally, exit the time setting to save all changes made! by ScegliAuto More videos
|
|
For advertising on this site Write to info@scegliauto.com
ScegliAuto is not responsible for any inaccuracy of the data in the lists. To report any inaccuracy or your business (if you own the business in question), please write to info@scegliauto.com
Number of seconds to generate the page: 0.041
(c) ScegliAuto 2026 - info@scegliauto.com - Privacy policy VAT number: IT01247470535 |
