
|
Do it yourself
| |||
| ||||


How to Replace the Fuel Filter on a Volkswagen Caddy
Model: Volkswagen Caddy
MK 3, 2K
- Years:
2003, 2004, 2005, 2006, 2007, 2008, 2009, 2010, 2011, 2012, 2013, 2014
Video tutorial
In this video tutorial, you can see how to replace the fuel filter on a Volkswagen Caddy by following some essential steps: the first thing to do is to purchase a new fuel filter from an authorised dealer; the next step is to get into the vehicle, turn off the engine, and pull the handbrake. Unscrew the fuel tank cap, lift the car, and place it on safety supports like axle stands. Use WD-40 spray to treat the fasteners connecting the hoses to the fuel filter. With a screwdriver, loosen the fastener of the fuel filter; use a container to catch any liquids. Remove the support brackets with a flat screwdriver and disconnect the hoses from the fuel filter, being careful of any fuel that may spill (wear appropriate PPE). Remove the old filter and place it in a container. Position the new filter and reconnect all parts in reverse order.
Updated on 11 June 2026 by ScegliAuto
Related tutorials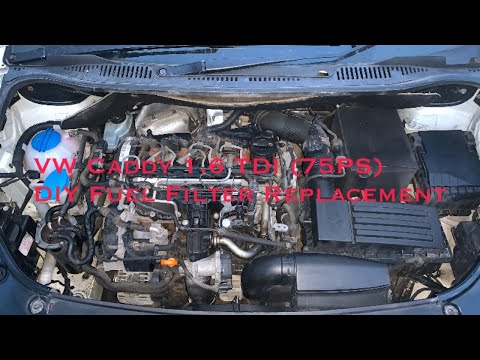
Volkswagen Caddy
(2003-2020 /
MK 3, 2K)
Today's instructions will show you how to remove and replace the diesel filter on a Volkswagen Caddy 1.6 TDI in simple steps. First, open the bonnet …

Volkswagen Caddy
(2003-2020 /
MK 3, 2K)
Want to replace the diesel filter on a VW Caddy? Here’s how to remove the filter and its associated parts. Lift the front bonnet of the car, then loc…

Volkswagen Caddy
(2003-2020 /
MK 3, 2K)
Here are the instructions for dismantling and replacing the diesel filter of the Volkswagen Caddy. First, open the bonnet of the vehicle and locate t…
ScegliAuto offers an extensive international collection of automotive tutorials available in 12 languages. Each guide combines instructional videos with original explanations written by experienced human editors, along with information about the car models covered.
Other guides you may be interested in
|
Resetting the Tyre Pressure Monitoring System (TPMS) Light on the Toyota Yaris
These brief and simple steps will show you how to reset the tyre pressure monitoring system (TPMS) light on the Toyota Yaris. Before resetting the light, ensure that all four tyres are at the correct operating pressure. Get inside the vehicle on the driver's side and locate the TPMS reset button found at the bottom left of the dashboard (next to the steering wheel); press and hold it until the TPMS light on the instrument cluster resets, following the video until the end! by ScegliAuto More videos
|
|
For advertising on this site Write to info@scegliauto.com
ScegliAuto is not responsible for any inaccuracy of the data in the lists. To report any inaccuracy or your business (if you own the business in question), please write to info@scegliauto.com
Number of seconds to generate the page: 0.026
(c) ScegliAuto 2026 - info@scegliauto.com - Privacy policy - About us VAT number: IT01247470535 |
