
|
Do it yourself
| |||
| ||||


Replacement brake discs and pads
Model: BMW Serie 3
E36
- Years 1990-2001 Once the car has been raised on a lift or on a crik, remove the wheel on which the repair must be carried out. At this point, with the 6mm hex wrench, loosen the bolt fixing the disc to the hub. Using the screwdriver, release the retaining spring on the brake caliper. Identify and remove the rubber caps on the rear of the brake caliper fixing pins and, with the 7mm hex wrench, unscrew these pins. With the help of the fixed screwdriver, pry between the brake disc and the caliper so as to make the piston retract and create the right clearance to allow you to easily extract the caliper. Using the 16mm ball wrench, unscrew the fixing pins of the brake caliper support. At this point remove the old brake disc from the hub (in the event that it is stuck, give the disc a few blows on the front and not sideways to free it). It is advisable to brush and clean the hub of any rust residues and to apply grease to protect it from oxidation. Then apply the new disc (after having cleaned it with solvent from any residual passivating oil) aligning the passage hole of the fixing pin with the threaded hole on the hub: screw and tighten this pin correctly with the 6mm hex wrench. Refit the brake caliper support bracket. Apply a new set of pads to the brake caliper and refit the caliper. Finally hook the retaining spring back onto the calliper. Before starting again, it is advisable to pump the brake pedal until it opposes the right resistance to make sure that the brake caliper piston reaches the end of its travel and to pay attention to the first braking. The tools needed to perform this repair are: a hammer, a medium-sized fixed screwdriver, a 6mm and a 7mm hex wrench, a 16mm and a 17mm ball wrench.
Posted on 27 June 2023 by ScegliAuto
 How to change the brake discs and pads on the BMW 3 Series F30
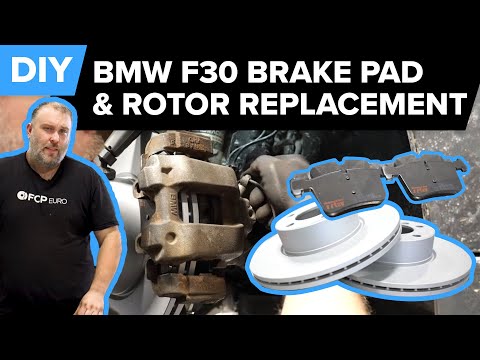
BMW Serie 3 (2012-2019 / F30, F31) In today's video tutorial we will see how to remove and replace the front brake discs and pads on the BMW 3 Series F30 and F31, following the instruc 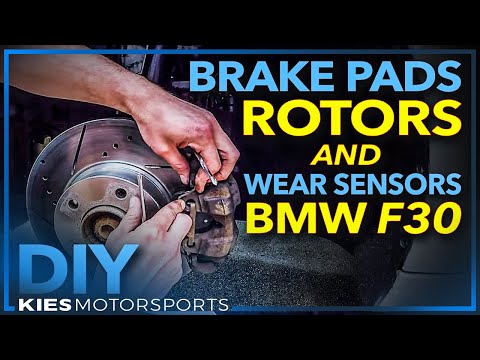 Replacement discs on BMW 3 Series
BMW Serie 3 (2012-2019 / F30, F31) Are the brake pads worn out? Do we want to replace the disk? Let's see how the pieces are disassembled. We lift the car on a column bridge, immediate 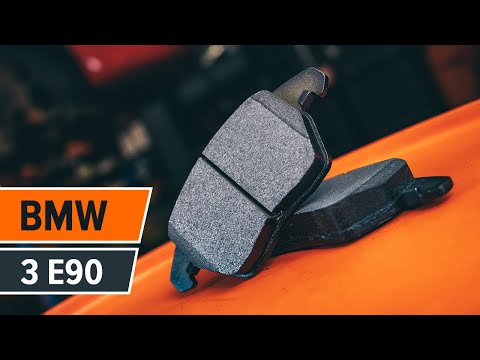 Replacement of the front brake discs and pads of the BMW 3.
BMW Serie 3 (2005-2013 / E92, E91, E90) Let's see how to change the brake discs and pads of the BMW 3 Series. We put the car on a lift and raise it to a working height, remove the front whe Other guides that may interest you
|
How to remove the telepass holder from the windshield
Today we will explain how to remove the telepass holder from a vehicle's windshield. Removing the telepass holder from the windshield is a very simple and quick operation to perform independently, you just need to use nylon thread that you will need to pull towards the holder and pass it between the holder and the clip. After performing this operation, the holder will be removed. There may be glue residues on the windshield that can be removed with a solvent suitable for glass cleaning. After cleaning everything, it is possible to mount another telepass holder on the windshield in the same position as the one removed or elsewhere. by ScegliAuto More videos
|
|
For advertising on this site Write to info@scegliauto.com
ScegliAuto is not responsible for any inaccuracy of the data in the lists. To report any inaccuracy or your business (if you own the business in question), please write to info@scegliauto.com
Number of seconds to generate the page: 0.319
(c) ScegliAuto 2025 - info@scegliauto.com - Privacy Policy VAT number: IT01247470535 |