
|
Do it yourself
| |||
| ||||


Fiat Bravo - Video tutorial
Model: Fiat Bravo
- Years 1995-2001 Before even applying the new gasket to the exhaust manifold, it is absolutely essential to carefully clean the gasket seat, eliminating any residual dirt and encrustation that could compromise its adherence and therefore its tightness; once the cleaning phase has been completed, insert the new gasket aligning it with the captive pins, then fit the exhaust manifold and tighten the relative fixing nuts with the torque wrench and in a crossed pattern in order to ensure uniform pressure of the manifold on the surface of the cylinder head and consequently the seal of the gasket.
Posted on 6 August 2023 by ScegliAuto
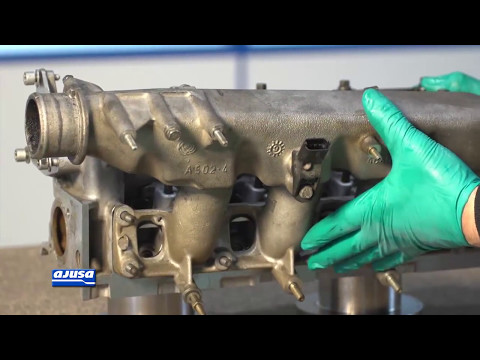 Intake manifold gasket replacement
Fiat Bravo (1995-2001 / ) Before proceeding with the installation of the new intake manifold gasket, it is absolutely essential to clean the surfaces, both of the manifold and 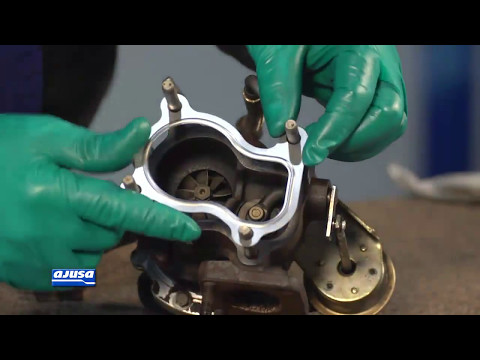 Turbine gasket replacement
Fiat Bravo (1995-2001 / ) The turbine gasket kit also includes the new stud bolts and the oil to be inserted in the variable geometry to ensure lubrication at the first start, 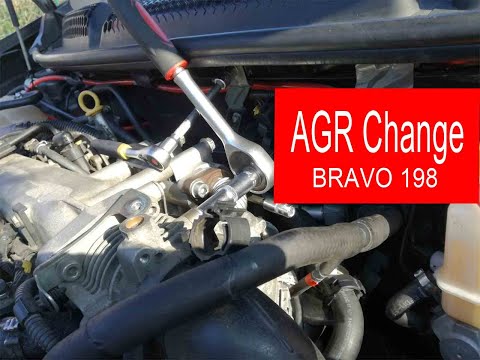 How to replace the EGR valve on the Fiat Bravo?
Fiat Bravo (2007-2014 / Bravo 2) To be able to replace the EGR valve on the Fiat Bravo, you have to open the bonnet to access the engine compartment: the valve will be positioned bet Other guides that may interest you |
Frequently Asked QuestionsHow to set the time in the Citroen DS3?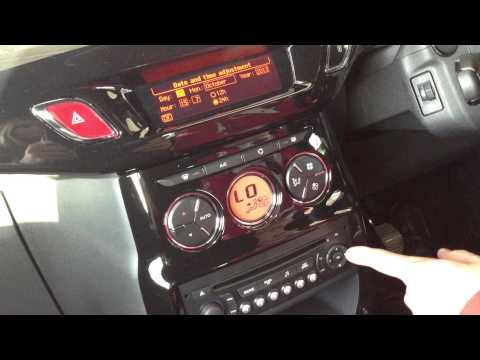
In this tutorial we can see how to set the time in the Citroen DS3, an extremely simple and fast operation, to be carried out for example after being left with the battery on the ground or following the transition to winter and summer time. First of all, turn on the instrument panel, then press the "Menu" button on the center console and enter the settings section. Then select "Display configuration", then "Date and time configuration" and proceed with the time change using the same keys. Once finished, we select "OK" at the bottom left. by ScegliAuto More videos
|
|
For advertising on this site Write to info@scegliauto.com
ScegliAuto is not responsible for any inaccuracy of the data in the lists. To report any inaccuracy or your business (if you own the business in question), please write to info@scegliauto.com
Number of seconds to generate the page: 0.030
(c) ScegliAuto 2024 - info@scegliauto.com - Privacy Policy VAT number: IT01247470535 |