
|
Do it yourself
| |||
| ||||


Hyundai I20 - Rear bumperRear Bumper Hyundai I20 (2014-2021 / gb, ib, mk 2) Hyundai I20 (2014-2021 / GB, IB, MK 2)
Removing the Rear Bumper of a Hyundai i20 In today's tutorial, you will learn how to remove the rear bumper of a second-generation Hyundai i20. First, unscrew all the fastening screws of the wheel …Read all… Posted on 28 May 2026 by ScegliAuto 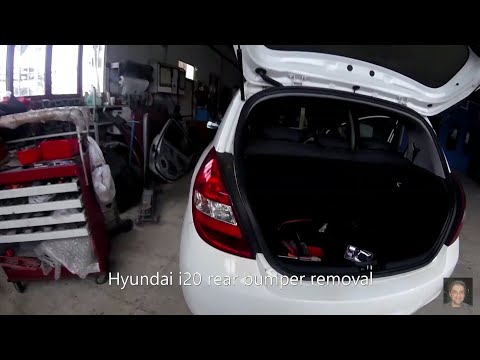 Hyundai I20 (2008-2014 / MK 1, PB)
Removing the Rear Bumper on Hyundai i20 To remove the rear bumper, start by taking off the rear lights: open the tailgate, unscrew the fixing screws of the lights located along the tailgate closure …Read all… Posted on 13 April 2026 by ScegliAuto Rear Bumper Hyundai I20 (2008-2014 / mk 1, pb)
Hyundai I20 (2014-2021 / GB, IB, MK 2)Removing the Rear Bumper of a Hyundai i20 In today's tutorial, you will learn how to remove the rear bumper of a second-generation Hyundai i20. First, unscrew all the fastening screws of the wheel …Read all… Posted on 28 May 2026 by ScegliAuto
Hyundai I20 (2008-2014 / MK 1, PB)Removing the Rear Bumper on Hyundai i20 To remove the rear bumper, start by taking off the rear lights: open the tailgate, unscrew the fixing screws of the lights located along the tailgate closure …Read all… Posted on 13 April 2026 by ScegliAuto Airbag (5) Alternator (2) Speaker (2) Car stereo (16) Battery (7) Bushings (1) Spark plugs (5) Body (2) Key (25) Timing belt (8) V-belt (2) Onboard computer (3) Checks and maintenance (15) Headlight (4) Tail light (2) Air filter (4) Cabin air filter (9) Diesel fuel filter (1) Parking brake (2) Fuel injectors (1) Accessory kit (1) Light bulb (2) Headlight bulb (7) Tail light bulb (7) Interior dome light bulb (1) Handle (2) Clock (9) Door trim panel (6) Front bumper (3) Rear bumper (2) Brake pads (4) Tires (3) Shift knob (3) Power window switch (2) Instrument cluster (1) Radiator (1) Fuse box (23) Brake system (1) Side mirror (6) Warning light – error code (15) (17) Tire pressure warning light (7) Service warning light (71) Brake drums and shoes (1) Fuel cap (4) Windshield wipers (1) Center console tunnel (1) EGR valve (1) Blower motor (1) Steering wheel (1) |
How to set the clock on the Vespa 125 Primavera?
To set the clock on the Vespa 125 Primavera, press and hold the black button located just below the black knob on the bike: keep the button pressed until the hour number starts to flash. Once it is flashing, you can change the hours with single presses of the same button; then, by pressing and holding the button again, the hour number will stop flashing and the minute number will start to flash, which can be modified in the same way, confirming the input by holding the button. by ScegliAuto More videos
|
For advertising on this site Write to info@scegliauto.com
ScegliAuto is not responsible for any inaccuracy of the data in the lists. To report any inaccuracy or your business (if you own the business in question), please write to info@scegliauto.com
Number of seconds to generate the page: 0.013
(c) ScegliAuto 2026 - info@scegliauto.com - Privacy policy VAT number: IT01247470535 |
