
|
Do it yourself
| |||
| ||||


|
Due to weather conditions, sunlight, car wash detergents, and the aging of the material itself, headlights tend to become cloudy, making them not only aesthetically unpleasing but also less efficient. You can restore their shine by performing a special polishing: start by masking the area around the headlight with masking tape, then wet sand it with very fine sandpaper (grit 2000) until it is uniformly cloudy. Next, perform several polishing passes with abrasive paste and a pad, and finally spray a clear coat. Another issue that can affect headlights is the formation of condensation inside: a solution may be to disassemble them and heat them in an oven, and if necessary, detach the lens to dry the interior completely and reassemble it, sealing it perfectly.
Updated on 16 February 2026 by ScegliAuto
This video is currently unavailable
Related tutorials
Lexus GS
(1997-2004 /
)
It can happen that the bulb in your car burns out, and in that case, it needs to be replaced. If you want to save money on an auto electrician, you c…
Lexus GS
(2005-2011 /
S190)
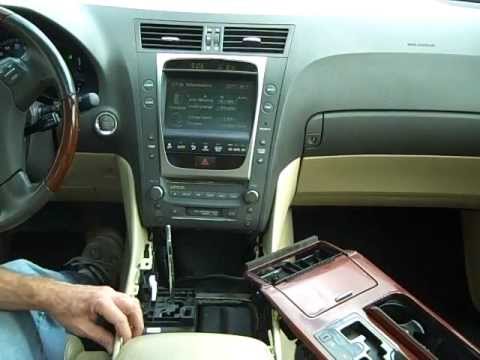
Removing the original car radio requires the removal of some trim elements from the centre console: start by unscrewing the gear lever knob after pos…
Lexus GS
(1997-2004 /
)
The upper wishbone of the front suspension consists of a ball joint connected to an extension of the hub support and two bushes with a silent block c…
Other guides you may be interested in
|
How to Remove the CV Boot on Fiat Panda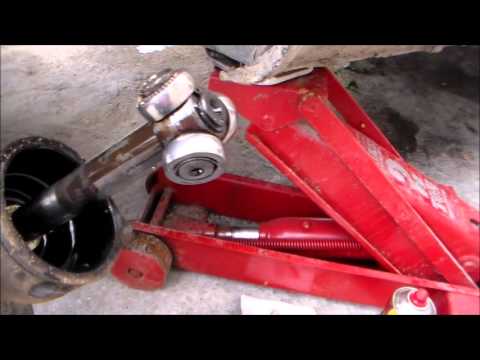
Let’s see how to remove the boot from the joint on a Fiat Panda. After positioning your car on a column lift: raise it to a comfortable height to work on, loosen the wheel nuts (using a socket wrench or air drill) and remove the wheel. Begin unscrewing the brake disc bolts with a socket wrench. Remove the bolts located under the disc and completely detach the wheel hub. Pull the arm around the joint with your hands. Fit the new boot (after removing the old one) onto the constant velocity joint, then start reassembling all the parts in reverse order. by ScegliAuto More videos
|

|
For advertising on this site Write to info@scegliauto.com
ScegliAuto is not responsible for any inaccuracy of the data in the lists. To report any inaccuracy or your business (if you own the business in question), please write to info@scegliauto.com
Number of seconds to generate the page: 0.060
(c) ScegliAuto 2026 - info@scegliauto.com - Privacy policy VAT number: IT01247470535 |