
|
Do it yourself
| |||
| ||||


Moto Guzzi California 1400 - Videoguide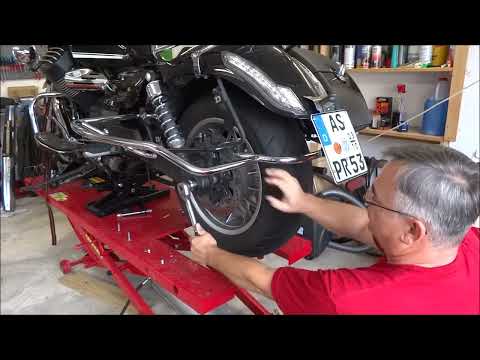 Moto Guzzi California 1400
 Disassembly of the rear wheel of the Moto Guzzi California 1400 In this guide, let's see the steps that will allow us to disassemble and replace the rear wheel, the brake disc and the tire of the Moto Guzzi California 1400. …read all… Posted on 16 May 2023 by ScegliAuto 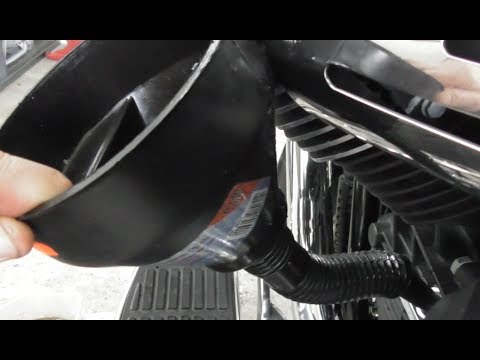 Moto Guzzi California 1400
 How do you change the engine oil on the Moto Guzzi California 1400? In order to change the engine oil of the Moto Guzzi California 1400, you need to loosen the oil tank drain plug, which is located in the lower central part of …read all… Posted on 12 May 2023 by ScegliAuto 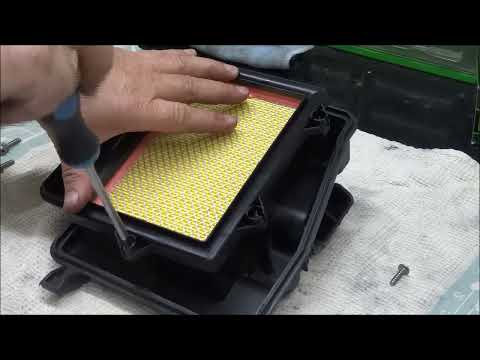 Moto Guzzi California 1400
 How do you replace the air filter on the Moto Guzzi California 1400? In order to replace the air filter on the Moto Guzzi California you have to loosen the screws that secure the saddle, so that it can be completely removed. …read all… Posted on 18 July 2022 by ScegliAuto 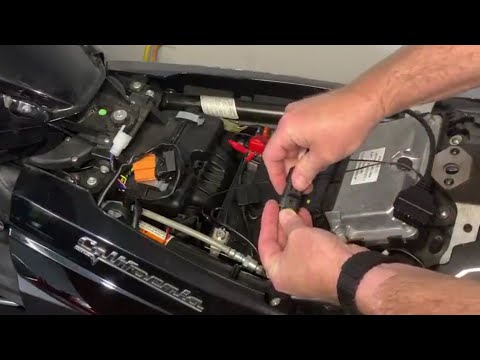 Moto Guzzi California 1400
 How is the diagnosis performed on the Moto Guzzi California 1400? In order to diagnose the Moto Guzzi California 1400, you need to access the components installed under the saddle: this must be removed from its housing by …read all… Posted on 22 April 2022 by ScegliAuto  Moto Guzzi California 1400
 How do you calibrate the Moto Guzzi California 1400 valves? To calibrate the Moto Guzzi California 1400 valves, the piston must first be moved to the top dead center position. To do this, remove the cap from which it is …read all… Posted on 15 February 2024 by ScegliAuto 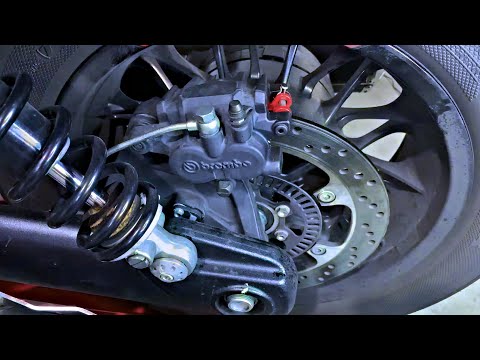 Moto Guzzi California 1400
 Replacement brake pads on Moto Guzzi California Raise the rear of the bike on a stand to replace the rear pads. Pull out the pin pin of the caliper (if you can't by hand use a pliers) and then the pin itself …read all… Posted on 23 January 2024 by ScegliAuto |
Where we find the fuses of the Mercedes Vito W639 with diagram
MERCEDES VITO W639 FUSE DIAGRAM Looking at the fuse diagram located under the driver's seat we find in position F6 the fuse for SAM-SRB in positions from 1 to 9 we find: in the first position the fuse for the left door control unit. In second position the fuse for the right door control unit. In third position the fuse for the PSM control unit. In fourth position the fuse for the PSM control unit. In the fifth position the fuse for the 12 socket located on the base of the passenger seat. In sixth position we find the fuse for the WVC charging line for the vehicle battery. In seventh position we find the fuse for the timer and for the lighting. In eighth position we find the fuse for the auxiliary heating and lastly we find the fuse for the folding roof. The main fuse box is located in the engine compartment on the passenger side and following the diagram we find: 1 Wiper FUSE 2 HORN FUSE 3 fuse Brake light switch 4 fuse for heating 5 fuse Diagnostic socket, rotary light switch, instrument panel 6 fuse Components motor 7 fuse Rear wiper 8 Terminal 87 (1) 9 Terminal 87 (2) 10 Terminal 87 (3) 11 Motor terminal 30 Z 12 Heated rear window 13 Ignition lock / instrument panel 14 Braking system 15 Headlight range control 16 Starter motor 17 Petrol pump 18 Cigarette lighter / glove box lighting 19 Radio 20 M112 ignition coils 20 HFM diesel 21 Automatic gearbox 22 Tachograph 23 Airbag control unit 24 Japanese rear-view mirror 25 Trailer control unit 26 Cut-off relay 27 Terminal 15 manufacturer of bodywork / equipment 28 Transmission unit 29 Part assistance system nza 30 Not assigned - 31 Horn ATA 32 Socket for mobile phone / VICS 5 33 Airbag, automatic child seat recognition 34 Terminal 15 R body / equipment manufacturer 35 Airplane control panel 36 Lumbar adjustment (seat) 37 Mirror light for Trick 38 Rear compartment entertainment 39 Not assigned - 40 Engine fuse (diesel) 10 40 Engine fuse (petrol) 41 Engine fuse (diesel) 10 41 Engine fuse (petrol) F1 Terminal 30 electrical system, alternator F4 Fuse for air conditioning fan (cooling unit) F5 FUSE for the secondary air pump Fuse block F35 IN THE FOLLOWING POSITIONS WE CAN FIND THE VARIOUS FUSES OF THE F35 BLOCK 21 12 Volt socket for passenger compartment, left 22 12 Volt socket for passenger compartment, right 23 Trailer power socket 24 Trailer recognition unit 25 Driver seat adjustment 26 Passenger seat adjustment 27 Electric sliding door, left ra 28 Electric sliding door, right 29 Rear fan 30 Air suspension system 31 Parktronic 32 Tire pressure monitor 33 Sound system 25 34 Mobile phone control unit / VICS, TV booster 35 Auxiliary heating control unit 36 Not assigned 37 System rear air conditioning system 38 COMAND camera control 39 Conventional taximeter 40 12 volt socket, rear right 41 Roof warning light control unit 42 Not assigned. by ScegliAuto More videos
|
|
For advertising on this site Write to info@scegliauto.com
ScegliAuto is not responsible for any inaccuracy of the data in the lists. To report any inaccuracy or your business (if you own the business in question), please write to info@scegliauto.com
Number of seconds to generate the page: 0.017
(c) ScegliAuto 2024 - info@scegliauto.com - Privacy Policy VAT number: IT01247470535 |