
|
Do it yourself
| |||
| ||||


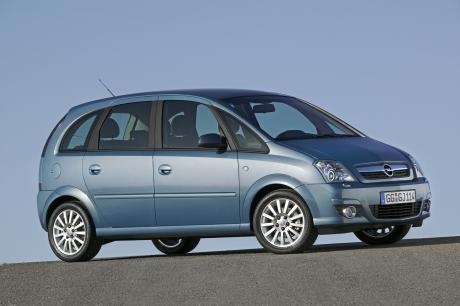
How to Replace the Side Indicator Bulb in the Opel Meriva
Model: Vauxhall Meriva
MK 1, Meriva A
- Years:
2003, 2004, 2005, 2006, 2007, 2008, 2009, 2010
Video tutorial
The side indicators on your Opel Meriva Mk1 are among the most important components of the car, despite their small size. They significantly improve the vehicle's visibility. Therefore, it is essential to replace the bulb if it malfunctions or breaks. Here's how to do it. First, get a small flat-head screwdriver. Next, use it to remove the side indicator from its housing. Pull out both the light unit and the old bulb with your hands and replace the latter with a new one. Finally, reassemble everything correctly.
Updated on 13 May 2026 by ScegliAuto
Related tutorials
Vauxhall Meriva
(2003-2010 /
MK 1, Meriva A)
To replace the number plate bulb of the Opel Meriva, use a screwdriver to pry at the side of the corresponding ceiling light: when the ceiling light …

Vauxhall Meriva
(2003-2010 /
MK 1, Meriva A)
In this guide, you will discover how to remove and replace the front headlight bulb on the Opel Meriva in simple and quick steps. First, open the bon…

Vauxhall Meriva
(2010-2017 /
Meriva B, MK 2)
When an Opel Meriva displays the code "error 20", it means the right main beam bulb needs replacing. To carry out the replacement, purchase an H7 bul…
ScegliAuto offers an extensive international collection of automotive tutorials available in 12 languages. Each guide combines instructional videos with original explanations written by experienced human editors, along with information about the car models covered.
Other guides you may be interested in |
How to Remove the Spare Wheel from the Citroen C4 Picasso
Follow these instructions to remove the spare wheel and replace it on the Citroen C4 Picasso. On this model, the spare wheel is located under the vehicle's floor; to lower it, simply unscrew the bolt to loosen the strap, then disconnect it from the spare wheel, as shown in the video. At this point, lift the vehicle and remove the wheel, securing the spare wheel or space-saver; tighten the bolts in a criss-cross pattern, finally placing the old wheel back under the vehicle's floor! by ScegliAuto More videos
|
|
For advertising on this site Write to info@scegliauto.com
ScegliAuto is not responsible for any inaccuracy of the data in the lists. To report any inaccuracy or your business (if you own the business in question), please write to info@scegliauto.com
Number of seconds to generate the page: 0.016
(c) ScegliAuto 2026 - info@scegliauto.com - Privacy policy - About us VAT number: IT01247470535 |
