
|
Do it yourself
| |||
| ||||


|
Model: Piaggio Vespa Gts 300
To set the clock on the Vespa GTS 300, follow these steps: Turn on the Vespa and ensure the display is on and functioning. Look for the clock setting button, usually located on the dashboard near the display. Press and hold the clock setting button for a few seconds. You may need to use a thin tool, like the tip of a pen, to press the button if it is small. After a few seconds, the clock display will start to flash or indicate that it is ready to be set. Use the clock adjustment buttons to set the correct time. These buttons are generally located near the clock setting button. Some Vespa GTS 300 models have a separate button to adjust hours and minutes, while others may require scrolling through options using a single button. After setting the correct time, press the clock setting button to confirm your selection. Check that the clock displays the correct time on the Vespa GTS 300 display.
Updated on 19 September 2026 by ScegliAuto
Video tutorial
Related tutorials
Vespa Gts 300
In this short and simple guide, you will learn how to adjust the clock and access the menu on the instrument panel of the Piaggio Vespa GTS 300. Firs…

Vespa Gts 300
In this tutorial we can see how to adjust the time on the Piaggio Vespa GTS 300 scooter, an extremely simple and quick operation, to be carried out f…

Vespa Gts 300
You can adjust the clock on the Piaggio Vespa GTS 300 by turning on the instrument panel and then navigating the menu that appears on the display by …
|
How to Replace the Battery in a Yamaha Vino 125 Scooter?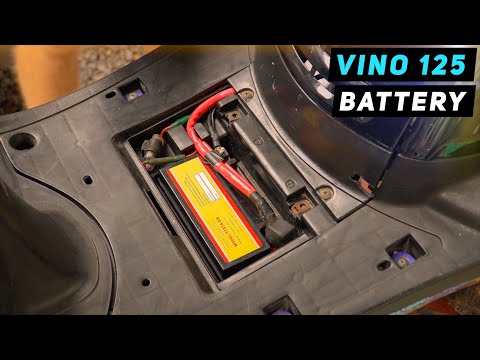
In this tutorial, you will see how to replace the battery in a Yamaha Vino 125 scooter, a very simple and quick operation. First, ensure that the key is not inserted for safety. Then, lift the rubber mat and, using a simple cross-head screwdriver, unscrew the two screws securing the plastic cover. Once opened, disconnect both terminals, starting with the negative, and remove the battery from its housing. To fit the replacement, simply follow the reverse procedure. by ScegliAuto More videos
|
|
For advertising on this site Write to info@scegliauto.com
ScegliAuto is not responsible for any inaccuracy of the data in the lists. To report any inaccuracy or your business (if you own the business in question), please write to info@scegliauto.com
Number of seconds to generate the page: 0.124
(c) ScegliAuto 2026 - info@scegliauto.com - Privacy policy VAT number: IT01247470535 |
