
|
Do it yourself
| |||
| ||||


Renault Clio - Video tutorial
Model: Renault Clio
Clio 2, MK 2
- Years 1998-2005 How to remove the front disc bearing on Renault Clio? First of all, we position our car on a column bridge (jack), loosen the pins with a telescopic wrench and lift it to a preferred height to intervene. We unscrew the pins and remove the rim, then we begin to unscrew the pins of the caliper support and detach it away. Unscrew the brake disc pins and detach it from the wheel hub, then, with a pincer, pull off the central hub cap. We loosen the maxi bolt with a suitable socket wrench and remove the piece away. Extract the bearing from the hub as shown in the video and compare it with the new piece; we will see the obvious difference between the two. Now we mount the bearing on the wheel hub and all the other pieces by working backwards.
Posted on 29 October 2023 by ScegliAuto
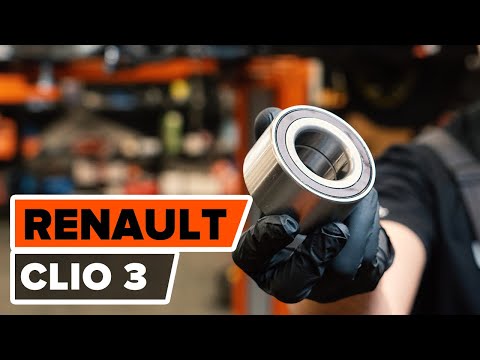 How to replace the front wheel bearing in a Renault Clio?
Renault Clio (2005-2013 / MK 3, Clio 3, Clio III) In this tutorial we can see how to replace the front wheel bearing in the Renault Clio, a simple operation but one that requires good manual skills. 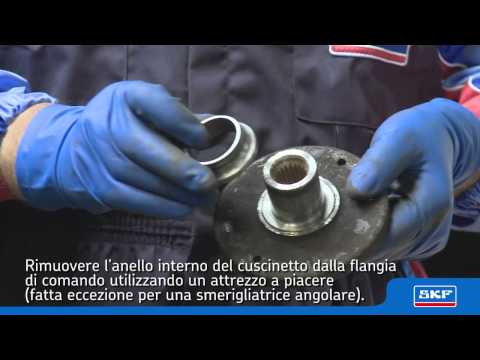 How to remove the wheel bearing on Renault Clio
Renault Clio (1998-2005 / Clio 2, MK 2) How to intervene on the disassembly of a wheel bearing with all the attached parts on Renault Clio. We place our car on a column bridge, loosen the p  How to remove the front brake disc of a Renault Clio
Renault Clio (2005-2013 / MK 3, Clio 3, Clio III) Let's see how to remove the front brake disc of a Renault Clio. We place our car on a column bridge, we lift to a comfortable height to intervene. We Other guides that may interest you
|
Disassembly of the gear knob on the Lancia Ypsilon 2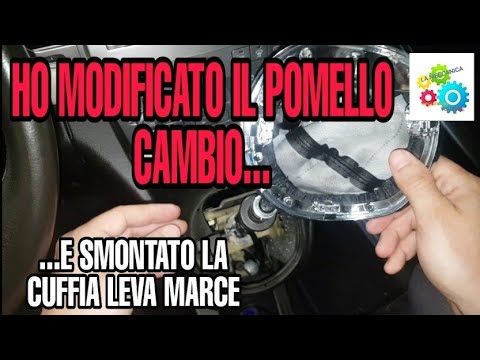
Today we will see, in this video tutorial, how to remove and replace the gear knob on the second series Lancia Ypsilon, but also on the Lancia Musa, in simple and quick steps. We get inside the car and start by removing the old gear knob; to do this, just unscrew it anticlockwise, as shown in the video. At this point we also remove the gearshift gaiter, in order to replace, if necessary, it too; we just have to fix the new headset and insert the new gear knob, screwing it correctly and without creating play on the gear lever! by ScegliAuto More videos
|
|
For advertising on this site Write to info@scegliauto.com
ScegliAuto is not responsible for any inaccuracy of the data in the lists. To report any inaccuracy or your business (if you own the business in question), please write to info@scegliauto.com
Number of seconds to generate the page: 0.039
(c) ScegliAuto 2024 - info@scegliauto.com - Privacy Policy VAT number: IT01247470535 |