
|
Do it yourself
| |||
| ||||


Replacement of Brake Pads and Discs
Model: Saab 9 3
MK 2
- Years 2002-2014
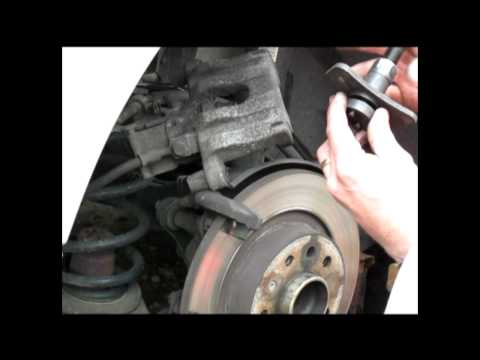
Loosen the wheel fastening bolts on the front wheels before lifting the vehicle and complete the disassembly after raising it. Then remove the fastening bolts of the brake caliper after removing the protective caps; then detach the retaining spring of the pads and remove the caliper and the pads themselves. Using a C-clamp, retract the caliper piston to accommodate the new pads. Next, remove the fastening bolts of the caliper bracket and take it off; then unscrew the fixing screw of the disc to the hub and remove the disc to apply the new one. Clean the bracket of any dirt residue and reattach it to the hub; finally, insert the new pads, the caliper (after lubricating the bolts), and the retaining spring.
Updated on 9 February 2026 by ScegliAuto
Video tutorial
Related tutorials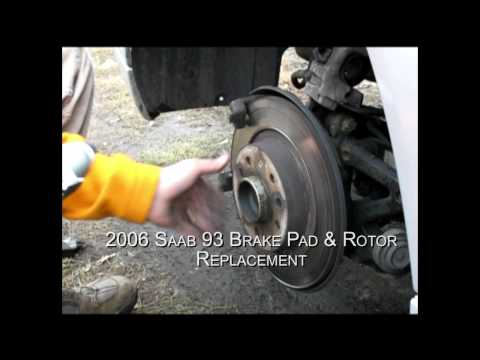
Saab 9 3
(2002-2014 /
MK 2)
Lift the vehicle on a lift or with a jack (in the latter case, apply axle stands for safety). Remove the wheel and the brake caliper from its support…
Saab 9 3
(2002-2014 /
MK 2)
This first part of the video illustrates how to change the brake pads on a 2006 Saab 9-3. A later section will also cover the replacement of the brak…

Saab 9 3
(2002-2014 /
MK 2)
To reset the service light on the 2008 Saab, get into the vehicle, engage the handbrake, and turn on the ignition. Next, locate the button panel on t…
Other guides you may be interested in
|
How to Remove the Door Panel from a Renault Clio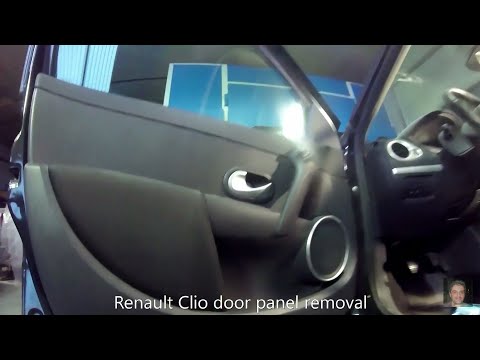
How to remove the panel from a Renault Clio? Don't worry, let's see together in this video how to proceed. Before starting the disassembly, disconnect the battery terminals located in the engine bay. Begin the disassembly: remove the plastic cover of the handle with a lever, then use a screwdriver to unscrew the internal door handle and the screws located there. Once removed, take out the window switch button, unscrew the internal door opening lever. Detach the door panel and disconnect the speaker. Be careful not to lose any of the clips behind the plastic panel you removed earlier. Replace the part and reassemble everything in reverse order. by ScegliAuto More videos
|
|
For advertising on this site Write to info@scegliauto.com
ScegliAuto is not responsible for any inaccuracy of the data in the lists. To report any inaccuracy or your business (if you own the business in question), please write to info@scegliauto.com
Number of seconds to generate the page: 0.063
(c) ScegliAuto 2026 - info@scegliauto.com - Privacy policy VAT number: IT01247470535 |