
|
Do it yourself
| |||
| ||||


Removal of the Hood and Rear Spoiler with Third Brake Light
Model: Smart Smart
Removing the hood is a straightforward operation. Open the boot and then release the retaining spring at the centre of the hood to lift the lower part. Remove the fabric from the hood from the metal frame along all edges. Using a Torx spanner, remove the four securing screws under the headlining. At this point, remove the outer plastic cover by disconnecting the third brake light cable. Unscrew the two side screws of the metal frame, then fully open the hood and detach it from the bodywork. Use a screwdriver to remove the side rubber seals and unscrew the securing screws of the side fabric that needs to be removed. Reposition the hood on the vehicle and close it to facilitate the complete removal process.
Updated on 2 February 2026 by ScegliAuto
Video tutorial
Related tutorials
Smart
(1998-2007 /
450)
All the steps required to dismantle the hood on the cabrio version of the Smart and to remove the rear spoiler with the incorporated third brake ligh…

Smart
(2007-2015 /
451)
Today we will discover the instructions that will allow us to disassemble and replace the third brake light bulb of the Smart Fortwo in simple steps.…

Smart
(2007-2015 /
451)
In order to replace the hood of the Smart 451, you need to detach the rivets located at the front of the hood, at the top of the windshield: once the…
Other guides you may be interested in
|
How to Install an Additional Horn on a Fiat Punto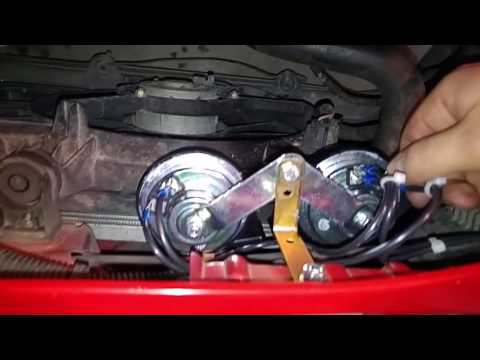
It may happen that the original horn starts to produce a sound that is noticeably underwhelming; at this point, you can decide to install a pair of sounders connected in parallel with the original one to achieve a more assertive sound. The installation is very easy, but it is important to direct the sound output towards an air intake, so you need to shape a support bracket to fix it to the slam panel with a single bolt. Once secured, take the positive power from the fuse box using a 2.5 mm² cable, tapping into the purple wire directly under the relay while connecting the ground directly to the negative terminal of the battery. by ScegliAuto More videos
|
|
For advertising on this site Write to info@scegliauto.com
ScegliAuto is not responsible for any inaccuracy of the data in the lists. To report any inaccuracy or your business (if you own the business in question), please write to info@scegliauto.com
Number of seconds to generate the page: 0.059
(c) ScegliAuto 2026 - info@scegliauto.com - Privacy policy VAT number: IT01247470535 |